|
12/5/2017 3 Comments Christmas MathHoliday Activities for Middle and High School Math Class
So, I am sharing some of my favorite holiday math activities your class is sure to love! With these easy, creative activities, you can still bring in the holiday cheer and have fun, while maintaining rigorous learning and hitting your math objectives. If you’re a Catholic school teacher, be sure to check out my ideas at the bottom that specifically follow your school’s beliefs and teachings!
For Everyone
Congruent Triangles: Winter Snowflake Level: 8th, 9th, 10th, 11th One of the easiest ways to bring holiday cheer into your classroom is through decorations. This FREE activity incorporates challenging problem solving and provides pretty student-made winter decorations for your walls. It’s a worksheet style set of practice problems including:


Trapezoid and Triangle Trees: A Holiday Math Activity
Level: 6th, 7th, 8th, This hands-on activity puts your students’ math skills to work! In groups, your students will work together to measure all sides, heights, and angles, classify polygons, find the area and perimeter of each piece, identify two separate pairs of similar figures, and cut to construct trees. By the end, you will have a whole winter forest of trees you can post on the bulletin board or wall! This activity covers the following concepts:

Christmas Price Index
Level: 7th, 8th, 9th, 10th, 11th, 12th This awesome and fun activity created by PNC, helps you introduce basic economics to your class by pricing out each gift from “The Twelve Days of Christmas”. Your students will work in groups to search on the internet and through ads to calculate the total cost of the twelve gifts mentioned in the song. There are more activities in the free downloadable lesson plan to guide you if you are looking to extend the lesson!
Equation Ornaments
Level: 6th, 7th, 8th, 9th In this activity you can have your students work to solve equations to color in beautiful ornaments, like a color by number. The awesome thing about this activity is how easily you are able to differentiate learning for your different learners. There are three different sets of equations. Set A is the easiest and contains a variable only on one side of the equation. Set B has a medium difficulty level with variables on both sides of the equation. Set C is the most challenging. You can choose one set, or choose to use any combination! 
Printable 3-D Ornaments
Level: 5th, 6th, 7th, 8th File Folder Fun provides an awesome free downloadable resource! Download and print these 3-D shapes for your students to cut out and glue together, allowing them to have some hands-on experience with shapes. Then, let them decorate their creations like holiday ornaments to hang around the classroom! You can even make a tree on your bulletin board (or a full, live tree if you have a spare corner in your room)! If possible, have students use tape instead of glue for easier assembly of the flaps. 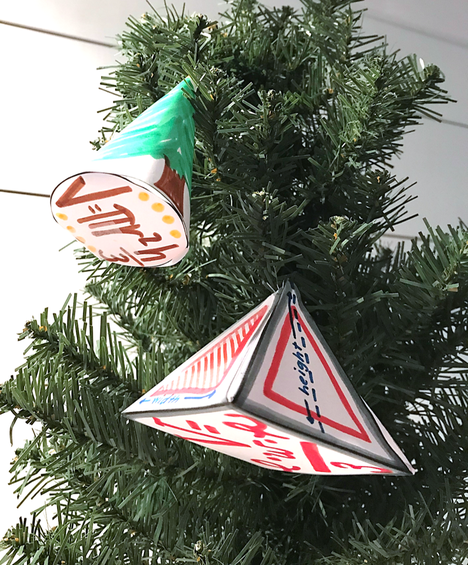
For Catholic Schools
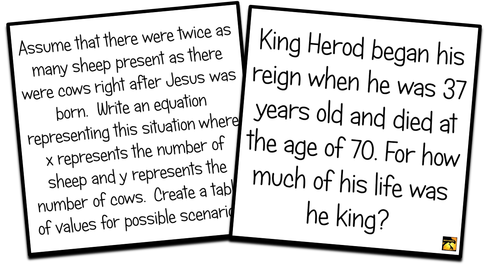
Christmas equations Level: 6th, 7th, 8th, 9th This activity includes a set of challenge equations, providing a fun approach to algebra and building problem-solving skills. Three levels are included: - 4 basic (easy) cards that can be used before or during middle school grades for critical thinking - 4 medium level cards that are perfect for middle school or high school students - 4 difficult cards that offer a challenge, even for high schoolers You can also use these when teaching substitution or the transitive property! 
Nativity Math Advent Calendar
Level: 3rd, 4th, 5th, 6th, 7th, 8th Advent is a very special time for the Church; you want your students to be thinking about it throughout the day. In this bulletin board sized Advent calendar, you get 24 flaps that each have a problem of the day based on the nativity. Your students will love entering the room each day knowing they are getting an exciting new problem. The best part is how it perfectly integrates math and religion! With this product you get many choices, so you can choose what’s best for you and your students. You have a choice of three designs (options for color printers as well as black and white on colored paper). There are three sets of problems included, one for grades 3-4, one for grades 5-6, and one for grades 7-8. Mix and match questions from each set of questions to perfectly fit what your students are covering, or simply print the set that best fits the grade(s) you teach. You will have plenty of options! 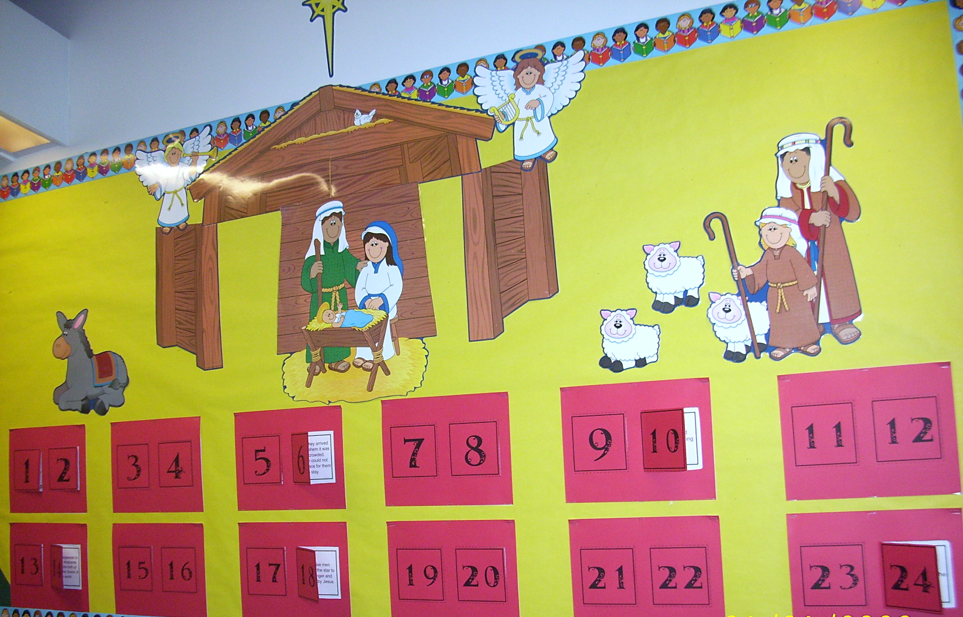
Mathematical Christmas Cards
Level: 9th, 10th, 11th, 12th An article on The Guardian shares an idea that includes making beautiful Christmas cards with the use of math through stitching geometrical designs on cards. Essentially, you draw two straight lines that intersect, and then draw points along those lines at equal distances. When you join dots from one line to the other, you get a perfect parabola. The article also shares how to achieve other intricate designs, and tips to make the project run smoothly! Do you have any ideas to bring the holiday cheer to your classroom? We would love to hear more! To Read Next:
3 Comments
11/15/2017 4 Comments Note Day Without All the GrumblingHow to fix the way your students take notes, the way they feel about note taking, and the way they remember the material
Sometimes students just need some teacher explanation in a lecture setting. Even with inquiry lessons, everyone still has to come together to sum it up, share the properties they discovered, and clear up any confusion. Kids need a written guide to reference later.
So, I have broken down the areas in which we need to improve note taking for you to take into consideration and make note day a day the students (and you) look forward to!
Make Note Taking More Effective
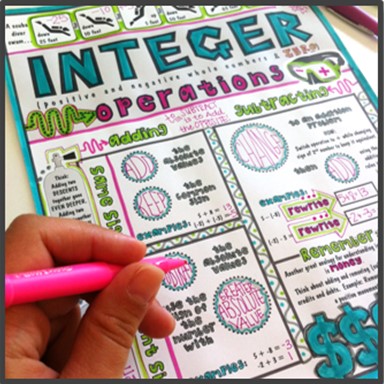
Note taking is so essential to your students’ educational success, especially when done in the most thoughtful, effective ways. There are some concepts you should think about incorporating in your lessons to make note taking the most efficient for student learning and retention! Visual Connections Visual connections make a huge impact in note taking and retention. The key to creating good visual notes is incorporating what I like to call “visual memory triggers.” These triggers are graphics or other images that contain or represent an analogy that helps the student understand and retain information. Click here to read a post all about How to Create Visual Memory Triggers. 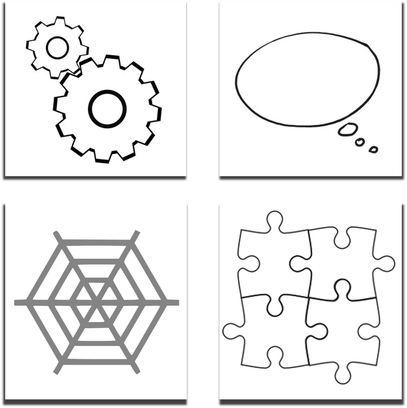
Explicitly Teaching Note Organization
Note taking does not come easily to some students, so it’s necessary to teach some organizational skills in taking notes. Students should be able to understand what information they should write down, and what information is okay to skip. Secondly, it is helpful for them to be able to go back and easily find a certain piece of information. We want note taking to be helpful for learning during the lecture, but we also want them to be able to refer back to clear, cohesive notes. Teaching your students to take highly organized notes is so important, especially if they are planning on attending college! 
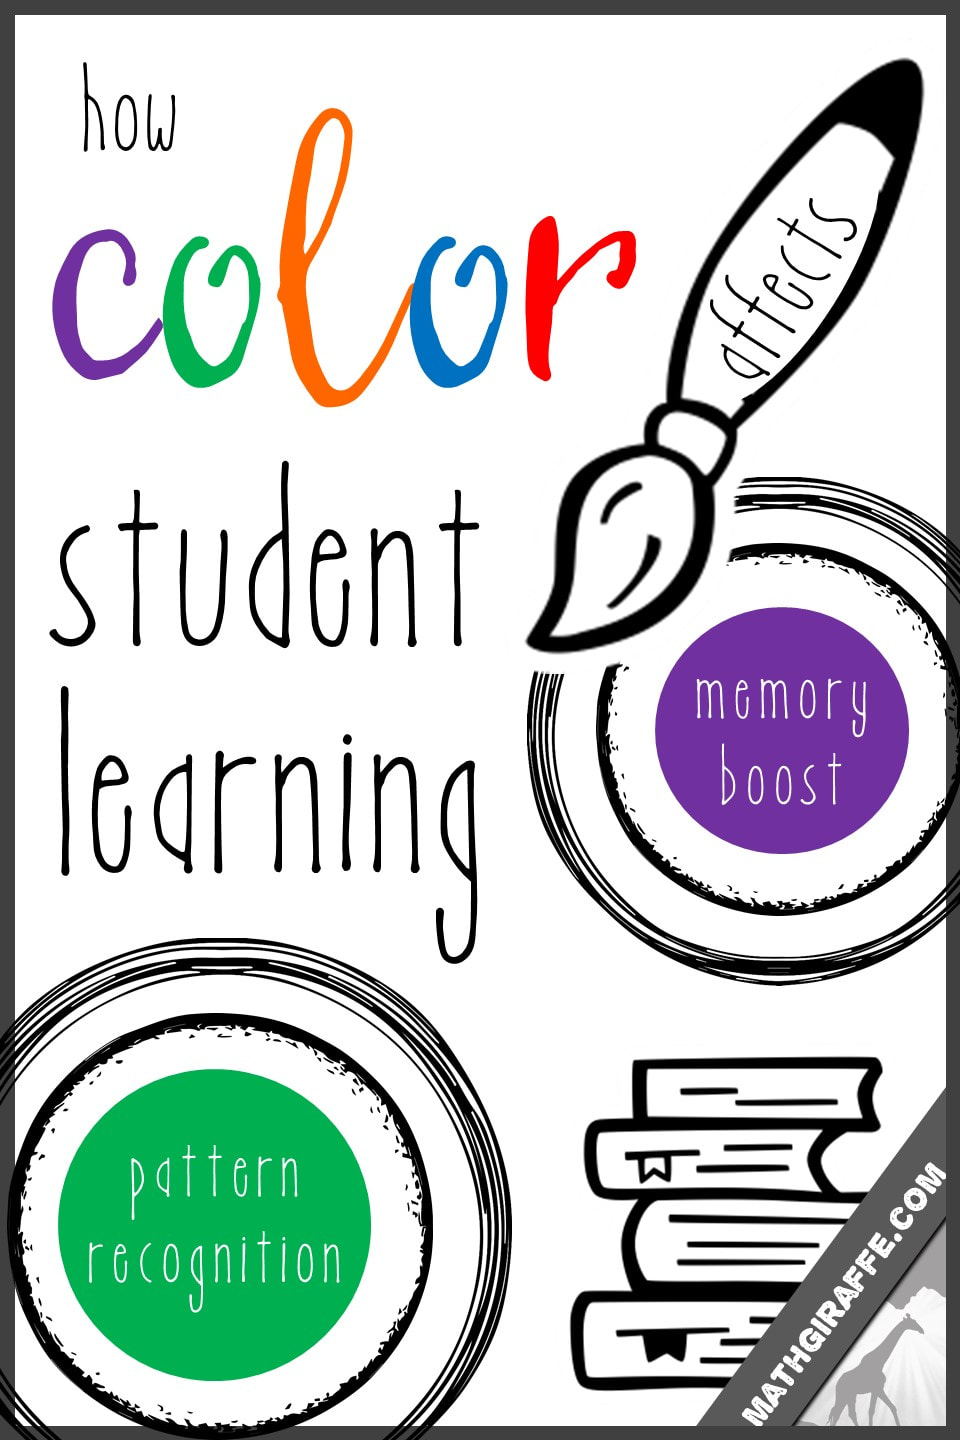
Incorporate Color
Incorporating color in some way during your lectures is so beneficial for students! Different colors, their combinations, and their placement can have an effect on attention, memory, feelings, and behaviors of students. Check out one of my recent posts, How Color Affects Student Learning. 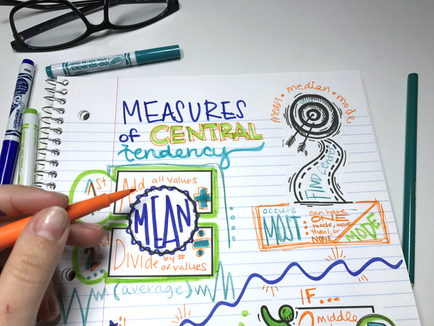
Notes by Hand
There is a lot of research out there that shows notes are so much better when taken by hand, rather than digitally. Scientific American tells us, that even though people generally type faster than write, more notes aren’t necessarily better. In three separate studies that compare students taking notes by hand vs. students taking notes by laptop, they found those who wrote out their notes had a stronger conceptual understanding and were more successful in applying and integrating the material.
Specific Strategies for Note Taking:
For example, if they use blue for all vocabulary words and definitions, they can better recall the words and definitions, or efficiently find it in their notes, later.
The perfect way to get started and decide if Doodle Notes is right for your class is downloading this FREE “Engage Your Brain” Doodle Notes! This page is a perfect way to introduce your class to a new strategy for taking effective notes and how their brain works! They can learn a little about the way the brain reacts when you integrate the left and the right hemispheres. You will quickly realize all of the benefits and your students will be begging for more Doodle Notes!
Cornell notes have been proven to be effective in student learning. This method involves recording notes during the lecture, asking questions after the lecture, reciting notes aloud, reflecting, and then reviewing.
Make Every Note Day a Great Day!
Make note-taking fun for the students and let them use any of their coloring utensils; this actually helps them remember better! As mentioned earlier, color helps students materialize the content. Another perfect, simple solution to livening up note day for you and your students is to implement Doodle Notes! When students use doodle notes, the two hemispheres of the brain collaborate to increase focus. They become excited, engaged, and attentive, so their retention is increased. Students interact with visual triggers that boost their memory for the lesson material. They become proud of their creative work on their page and suddenly begin pulling out their notes sheets consistently to review, show them off, and reference them as a study guide. Added bonuses include relaxation, coordination, and a boost in problem solving skills. Once students, try it they will be excited to try more! Doodle Notes Days will be days to look forward to. You can download a free handbook on Doodle Notes,here! Make it a goal of every note-taking day to engage student brains just as much as you do on an activity / practice day. Be sure that they make solid mental connections and then walk away with a clear, colorful graphic organizer that can become their reference guide to look back at later. 
I hope you gained some valuable information from this post to help make note taking days as awesome as possible! Do you have any foolproof lecture or note day strategies? Please share in the comments below!
Loving the creative math teaching ideas? Enter your email to get more strategies, updates, and resources in your inbox: 
To Read Next:
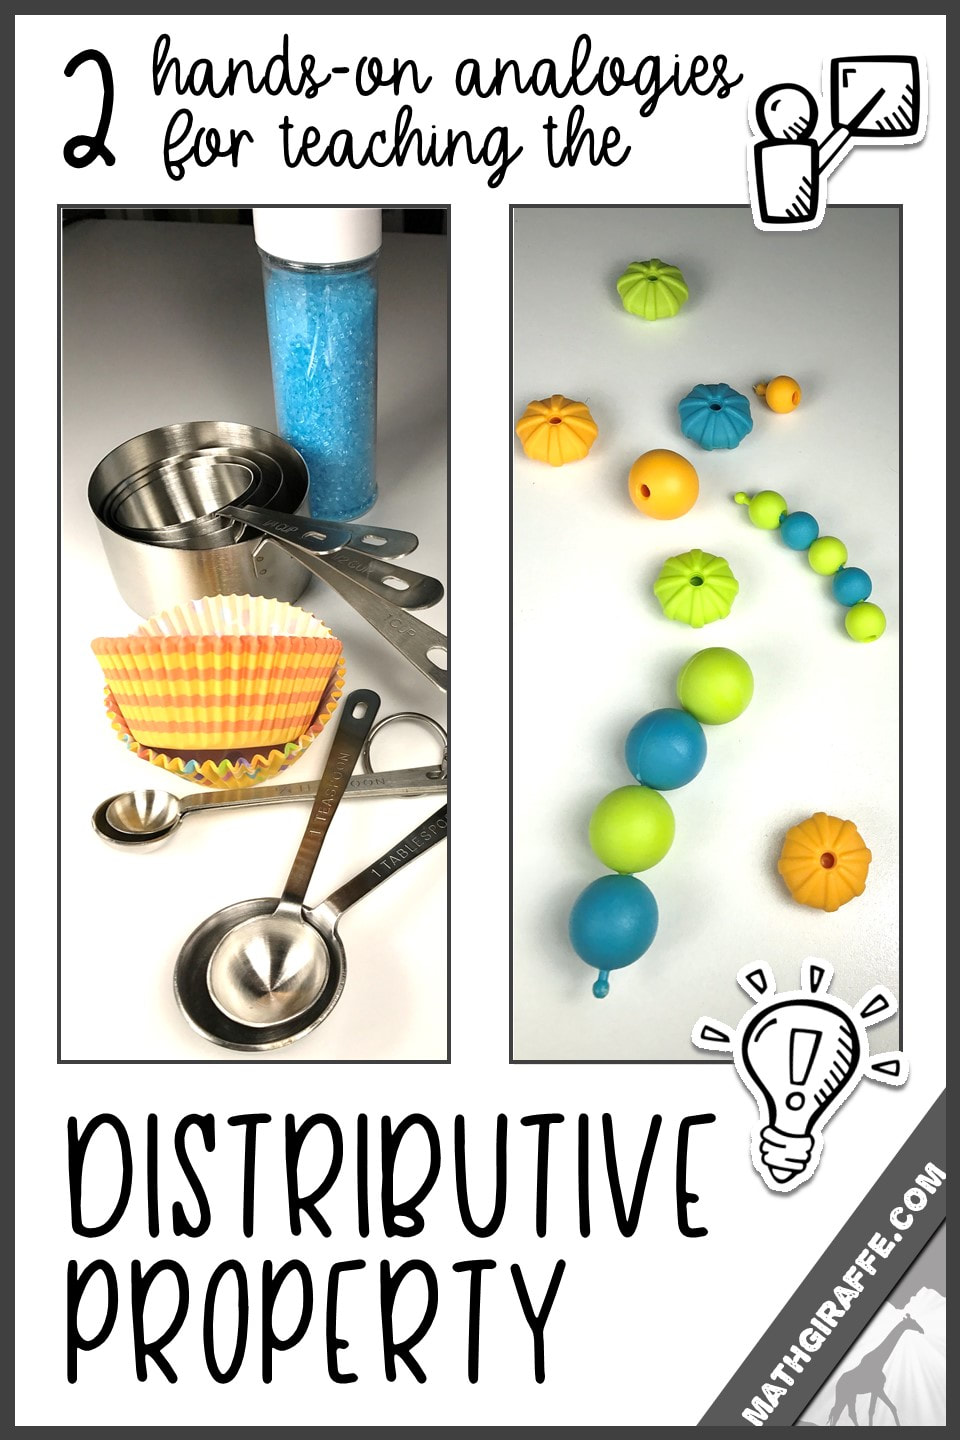
A Better Way to Explain the Distributive Property - with Clear, Hands-On Analogies Your Students Can Relate To
1. Making Bracelets
A great analogy for teaching the distributive property is making bracelets with beads; this is a task that students have either done before or have the ability to easily understand! Analogy: If you are creating multiple bracelets of a certain type, you must multiply the number of bracelets being made by EACH bead type. Just like with the distributive property, you multiply the outer term by EACH term in the parentheses. A common mistake students make is only multiplying the first term and not distributing throughout each term in the parentheses. This bracelet analogy creates evidence to see that you must distribute throughout each term inside the quantity. This Distributive Property Investigation Activity is perfect for getting your students to discover and thoroughly understand this bracelet analogy. This set of worksheets is structured as a guided inquiry, so students are discovering the property themselves. This helps the students to gain a deeper understanding of the distributive property. The inquiry activity would be great for either introducing the distributive property, or a creative way to review the topic. An inquiry-based approach to teaching math has many benefits for your students, including enhancing independent problem-solving skills and leading to deeper understanding of a concept. Instead of just memorizing the property, they learn WHY it works and HOW it works. It is important to let your students build a concept, not just follow a process. 

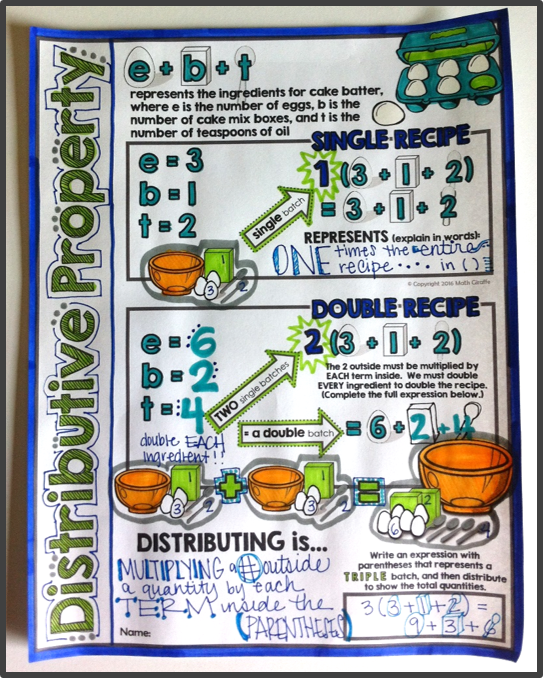
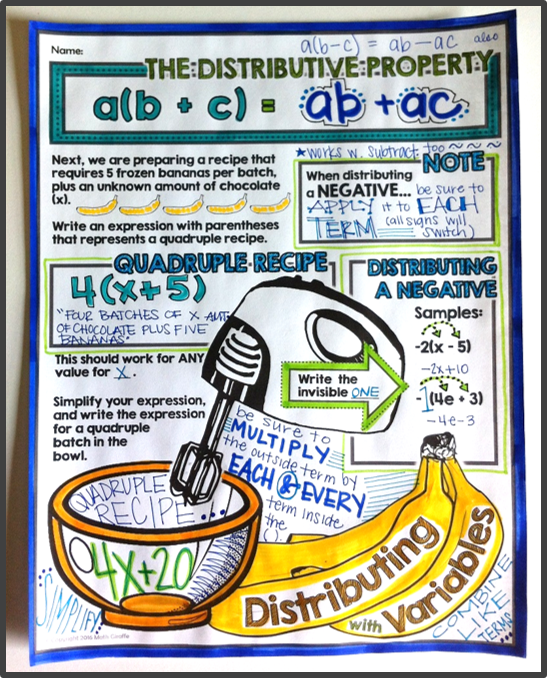
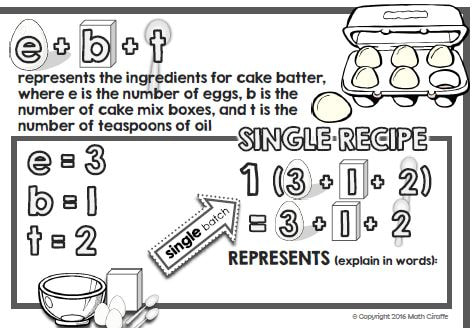
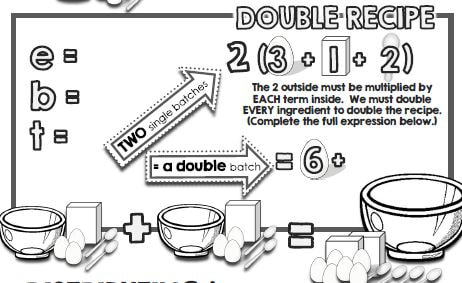
2. Recipes
Relating the distributive property to recipes is helpful, because by this age, students tend to have a strong understanding of how recipes work, and you can create a fun, interactive lesson. Here’s how to relate the distributive property: Ask, “What do you do to double a recipe?” Analogy: To double the whole recipe, you must be sure you remember to double EACH AND EVERY ingredient. When using the distributive property, you have to remember to multiply by EACH AND EVERY term in the parentheses. If you forget to double one of the ingredients, the recipe won’t turn out exactly right; just like you will get an inaccurate answer if you miss a term when distributing. You must distribute to each term in the parentheses. This set of doodle notes will perfectly coincide with teaching the distributive property using this analogy. When students color or doodle in math class they activate both hemispheres of the brain. There are many proven benefits to this cross-lateral activity, including new learning, relaxation (less math anxiety), visual connections, and better memory and retention of the content!
With these doodle notes, you get sheets for students to fill in, complete the examples, and color, doodle or embellish - all about the distributive property! Then, they can use it as a study guide later on. They love to pull these beautiful pages back out to use as a reference throughout the year.
Another inquiry-based approach includes assigning students to bring in any recipe to class the day you are introducing the distributive property. Have your students work in pairs or independently to double their recipes; there are benefits to both. Working collaboratively on this is beneficial, because they have the opportunity to bounce ideas off of each other and share their recipes with each other. Working individually enhances their independent problem-solving skills.
If you do try this as a hands-on exploration, it really helps to limit your students to a very simple recipe with ony 3 ingredients and one container required. (for less mess, less time, and a clearer math representation.) Simple things like punch or trail mix work well.
After they double their recipe, they can triple it, multiply it by 4, and so on. Next, students should determine the pattern they see, and they should write a rule for the property. Now, when you teach the distributive property, your students have already internalized this property; they have discovered it for themselves! Another fun way to teach this is to have a pancake day in class!! Bring just one big batch of supplies to cook pancakes for all your students, and cook them on a griddle in the front of the classroom. Show an expression on the board representing how many batches you'll need with each ingredient's quantity listed inside parentheses. Talk it through and let the kids help you out when you make the "mistake" of only doubling the first ingredient in the quantity. Sum up your work on the board with a big "Pancake Algebra Expression." 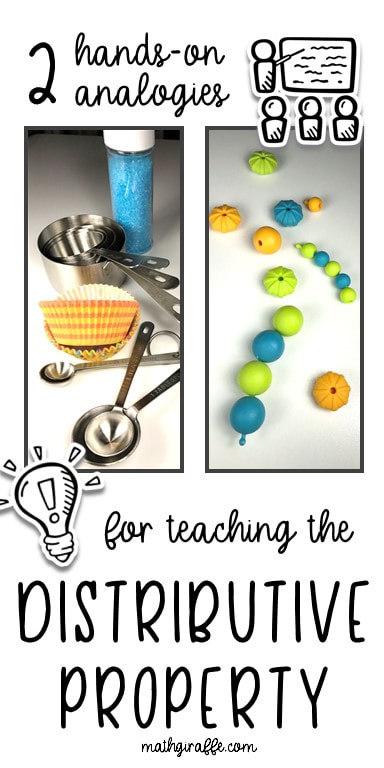
I hope you and your students enjoy these two analogies for teaching the distributive property! Each analogy greatly enhances student understanding, especially when paired with an inquiry-based approach or these doodle notes. Do you have any other helpful analogies for teaching Pre-Algebra concepts in a clearer way? We’d love to hear!
Enter your email to receive future updates, free resources, and teaching ideas: |
Archives
December 2023
Click to set custom HTML
|

 RSS Feed