
|
11/15/2017 4 Comments Note Day Without All the GrumblingHow to fix the way your students take notes, the way they feel about note taking, and the way they remember the material

Sometimes students just need some teacher explanation in a lecture setting. Even with inquiry lessons, everyone still has to come together to sum it up, share the properties they discovered, and clear up any confusion. Kids need a written guide to reference later.
So, I have broken down the areas in which we need to improve note taking for you to take into consideration and make note day a day the students (and you) look forward to!
Make Note Taking More Effective
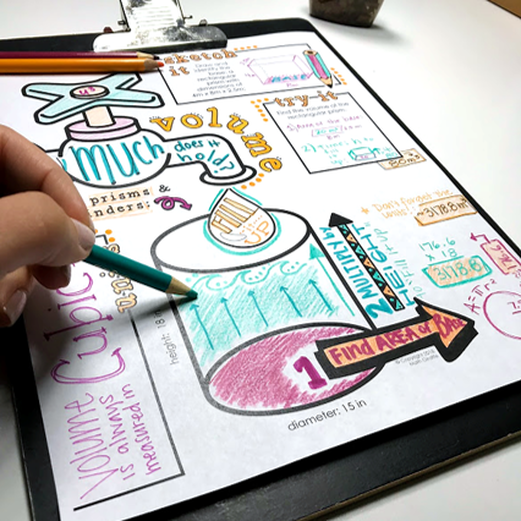
Note taking is so essential to your students’ educational success, especially when done in the most thoughtful, effective ways. There are some concepts you should think about incorporating in your lessons to make note taking the most efficient for student learning and retention! Visual Connections Visual connections make a huge impact in note taking and retention. The key to creating good visual notes is incorporating what I like to call “visual memory triggers.” These triggers are graphics or other images that contain or represent an analogy that helps the student understand and retain information. Click here to read a post all about How to Create Visual Memory Triggers. 
Explicitly Teaching Note Organization
Note taking does not come easily to some students, so it’s necessary to teach some organizational skills in taking notes. Students should be able to understand what information they should write down, and what information is okay to skip. Secondly, it is helpful for them to be able to go back and easily find a certain piece of information. We want note taking to be helpful for learning during the lecture, but we also want them to be able to refer back to clear, cohesive notes. Teaching your students to take highly organized notes is so important, especially if they are planning on attending college! 
Incorporate Color
Incorporating color in some way during your lectures is so beneficial for students! Different colors, their combinations, and their placement can have an effect on attention, memory, feelings, and behaviors of students. Check out one of my recent posts, How Color Affects Student Learning. 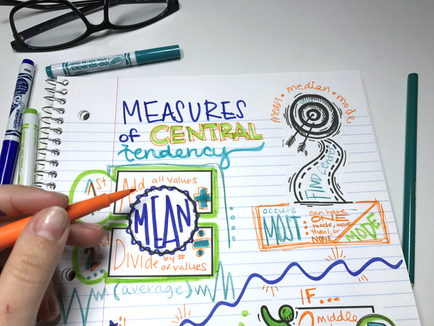
Notes by Hand
There is a lot of research out there that shows notes are so much better when taken by hand, rather than digitally. Scientific American tells us, that even though people generally type faster than write, more notes aren’t necessarily better. In three separate studies that compare students taking notes by hand vs. students taking notes by laptop, they found those who wrote out their notes had a stronger conceptual understanding and were more successful in applying and integrating the material.
Specific Strategies for Note Taking:
For example, if they use blue for all vocabulary words and definitions, they can better recall the words and definitions, or efficiently find it in their notes, later.
The perfect way to get started and decide if Doodle Notes is right for your class is downloading this FREE “Engage Your Brain” Doodle Notes! This page is a perfect way to introduce your class to a new strategy for taking effective notes and how their brain works! They can learn a little about the way the brain reacts when you integrate the left and the right hemispheres. You will quickly realize all of the benefits and your students will be begging for more Doodle Notes!
Cornell notes have been proven to be effective in student learning. This method involves recording notes during the lecture, asking questions after the lecture, reciting notes aloud, reflecting, and then reviewing.
Make Every Note Day a Great Day!
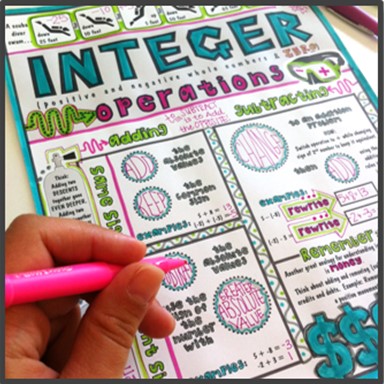
Make note-taking fun for the students and let them use any of their coloring utensils; this actually helps them remember better! As mentioned earlier, color helps students materialize the content. Another perfect, simple solution to livening up note day for you and your students is to implement Doodle Notes! When students use doodle notes, the two hemispheres of the brain collaborate to increase focus. They become excited, engaged, and attentive, so their retention is increased. Students interact with visual triggers that boost their memory for the lesson material. They become proud of their creative work on their page and suddenly begin pulling out their notes sheets consistently to review, show them off, and reference them as a study guide. Added bonuses include relaxation, coordination, and a boost in problem solving skills. Once students, try it they will be excited to try more! Doodle Notes Days will be days to look forward to. You can download a free handbook on Doodle Notes,here! Make it a goal of every note-taking day to engage student brains just as much as you do on an activity / practice day. Be sure that they make solid mental connections and then walk away with a clear, colorful graphic organizer that can become their reference guide to look back at later. 
I hope you gained some valuable information from this post to help make note taking days as awesome as possible! Do you have any foolproof lecture or note day strategies? Please share in the comments below!
Loving the creative math teaching ideas? Enter your email to get more strategies, updates, and resources in your inbox: 
To Read Next:
4 Comments
10/23/2017 9 Comments Transversals & Parallel LinesFun Ideas for Special Angle Pairs
Introducing Transversals & Parallel Lines
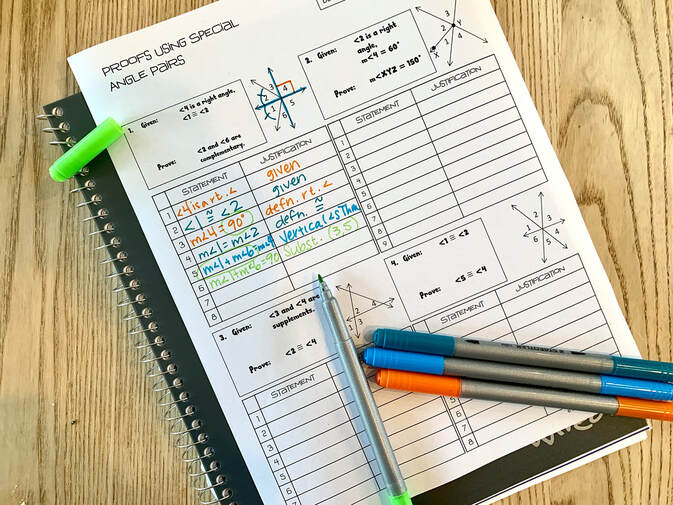
First, students will need to be able to identify angle pairs, then know the properties and relationships that exist when the lines that the tranversal intersects happen to be parallel. The perfect solution for you and your students is to incorporate doodle notes into your lesson. Kids can draw out a big transversal crossing a pair of lines in their notebook and then color code. They can then make an attempt at structuring their own sketch notes for the properties that special angle pairs have when the lines are parallel. Colors and patterns help students to learn and remember the special angle pairs, plus they can reference the visual notes at any time and use their color and pattern codes to identify the special angles. 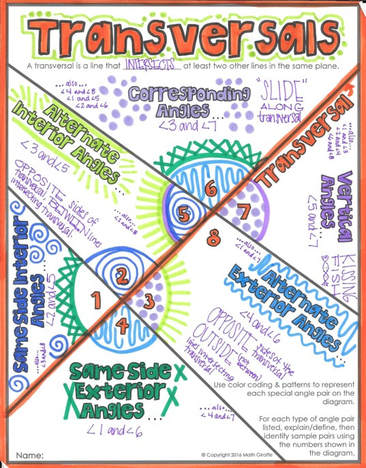
Or if you want to step it up a notch, these doodle notes coincide exactly with teaching transversals! The set includes sheets for your students to fill in, answer questions, and doodle on/embellish. The content includes:
- identifying special angle pairs - alternate interior - alternate exterior - corresponding - vertical - same-side interior - same-side exterior - theorems for parallel lines that intersect a transversal - converses of the theorems - using linear pairs and the special angle pairs to find missing angle measures - practice and examples 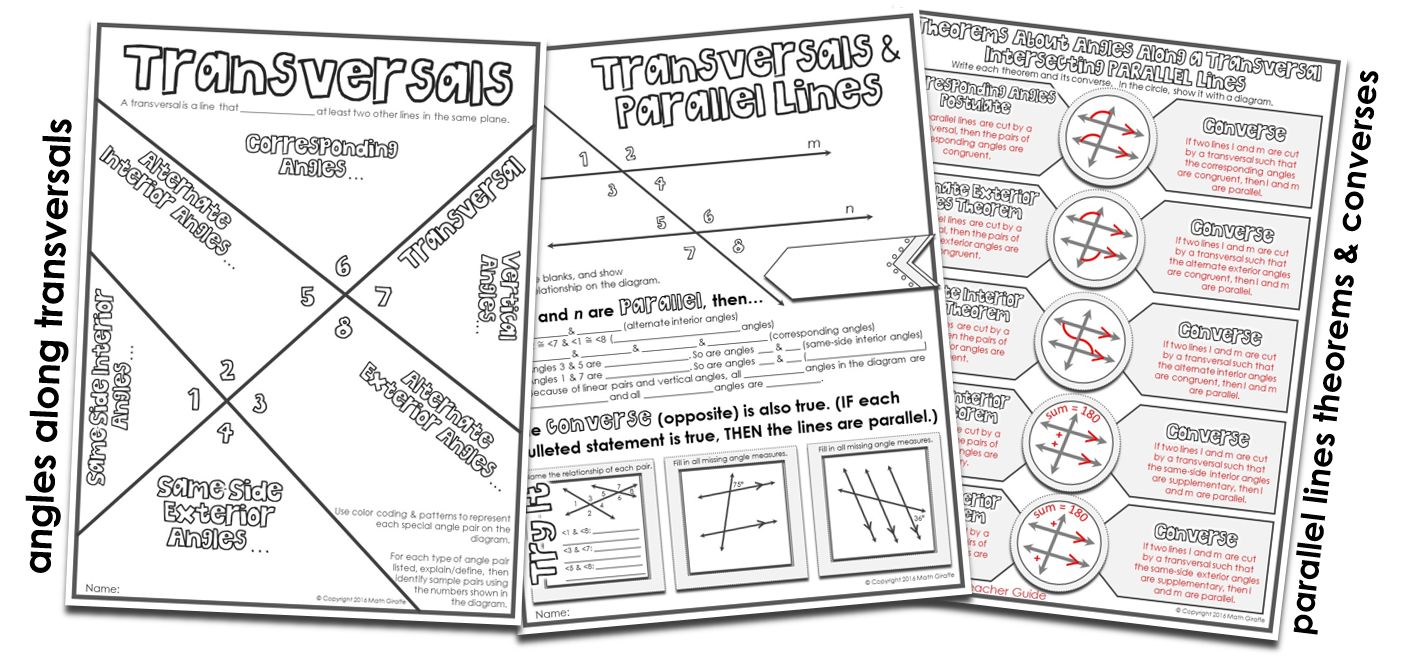
Why should you incorporate doodle notes or sketch notes in class? If you haven’t read my recent posts, doodle notes use both the left and the right hemispheres of the brain; there are so many proven benefits to this!
The proven benefits of communication between the two hemispheres of the brain include focus, learning, memory/retention, and even relaxation. The right and left hemispheres of the brain communicate through the corpus callosum, a fiber bridge that crosses between the two sides. When you encourage interaction between the hemispheres of the brain, you strengthen this connection. In addition to doodle notes, there are many other ways to activate the right brain in your math class! A recent study proved that doodling increases focus and the ability to recall new information. With these color-it-in, doodle-friendly note sheets, your students can use their colored pencils and the right side of their brains, and then remember key vocabulary, math examples, and new concepts more easily. It’s amazing to see students so engaged while making connections in their minds about a topic. This makes the concept really stick! 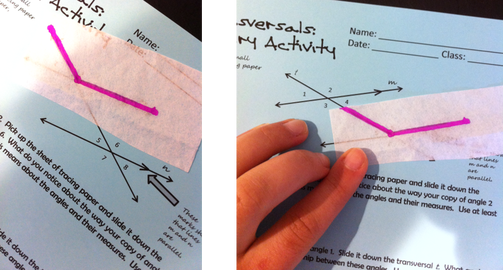
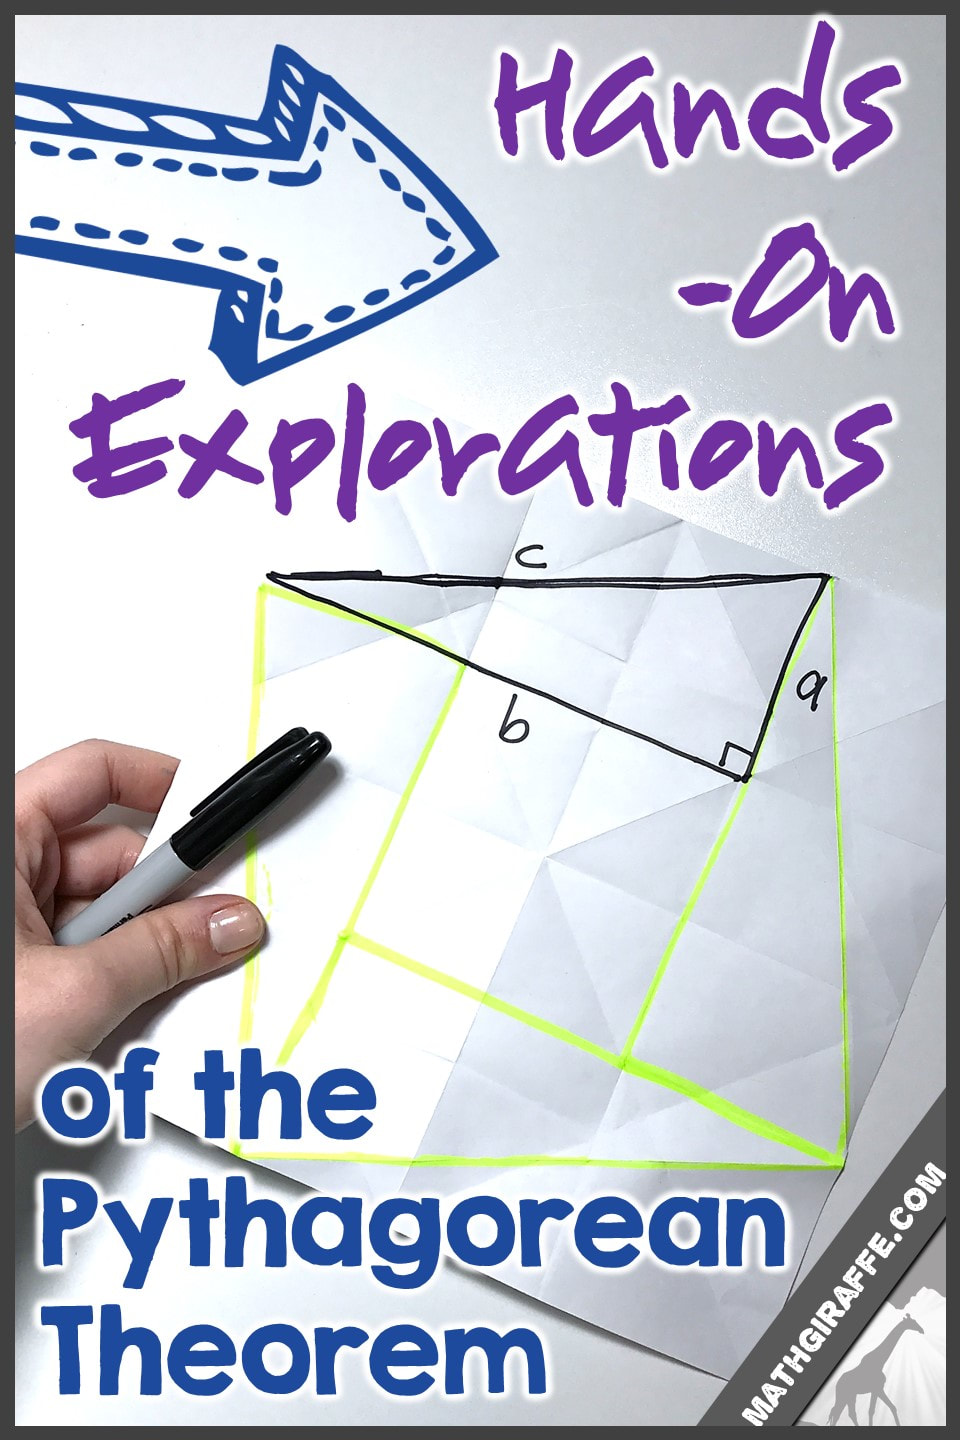
Another great way to introduce transversals is through this inquiry lesson pack. This lesson pack begins with an investigation where students discover properties of corresponding angles by sliding tracing paper down the transversal. Through this and the other components of this lesson pack, your students will gain a strong understanding about angle relationships that occur when a transversal is cut by parallel lines, while showing more engagement in the lesson.
Practicing with Special Angle Pairs
Once students are familiar with identifying angle pairs and the properties, they will love trying an exciting game for hands-on practice! This familiar game will help the students remember these properties in an active, engaging way. Take a look at this video on how to play “Twisted Fingers.” Or read on for a description.
You can make your own or check out this pre-made game set. There are two different game boards plus a spinner included. You’ll need push pins, erasers, and paper clips for spinner assembly (unless you have a set of plastic spinners).
Students play in small groups. The spinner tells what type of angle pair to find and whether to place fingers or thumbs on it. The game is over when a player cannot simultaneously keep the correct fingers on the correct spaces or cannot reach an angle pair that fits the criteria. 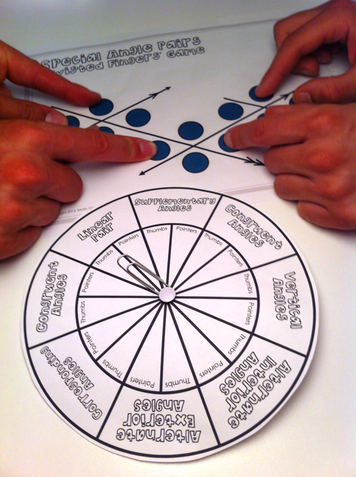
Challenge Activities with Transversals, Angles, & Parallel Lines
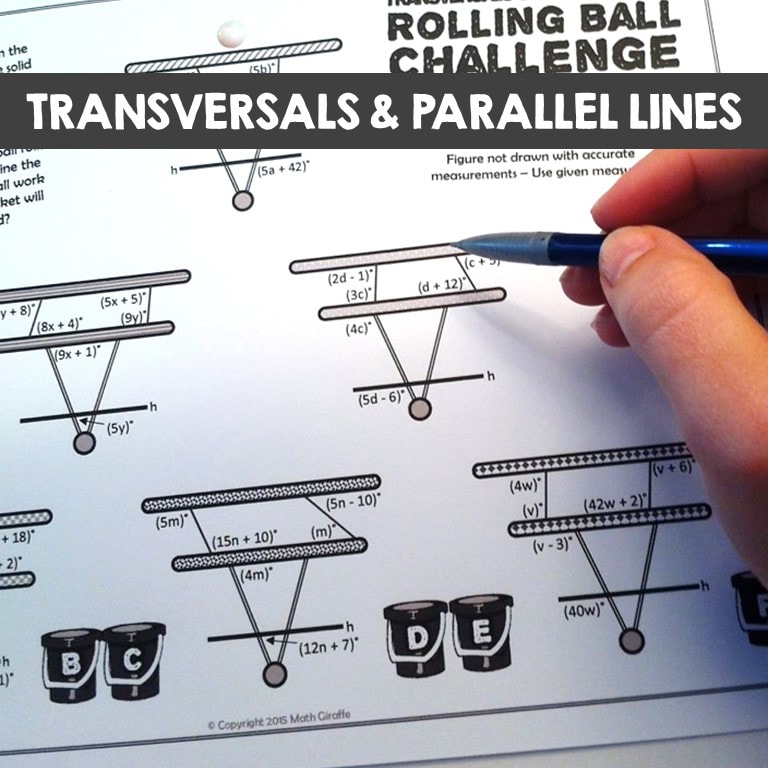
Do you ever struggle with keeping fast learners occupied and engaged, while also extending their learning? Thinking of new, creative ways to extend learning can be difficult. For those students who are ready for an extra challenge when teaching transversals, try this rolling ball game. In this game, students use properties and theorems for parallel lines cut by a transversal, and then write and solve systems of equations to determine angle measures. 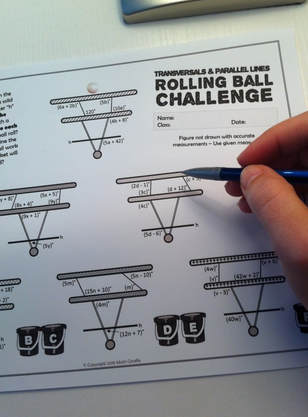
The goal is to figure out the slight slant of each set of ledges in order to determine which way the ball will roll. Students have to figure out where the ball will end up. This activity combines Geometry skills, Algebra skills, and Critical Thinking skills; it will definitely be a fun task for those who are ready and up for the challenge!
It’s pretty tricky, so be ready! For easy differentiation, there are 2 separate worksheets that you can use to meet and challenge each student’s ability. I hope you find some of these unique ideas helpful for your teaching! Do you have any creative ways to introduce, practice, or offer a challenge for your students when teaching this unit? Comment below; we’d love to hear your thoughts! Enter your email address to get resources, updates, and more: What Needs to Happen at Each Level and How to Incorporate Activities that Lead Students from one Level to the Next
What makes geometry concepts so challenging for some students? There have been many teachers who have attempted to make the formal understanding easier with new programs and methods.
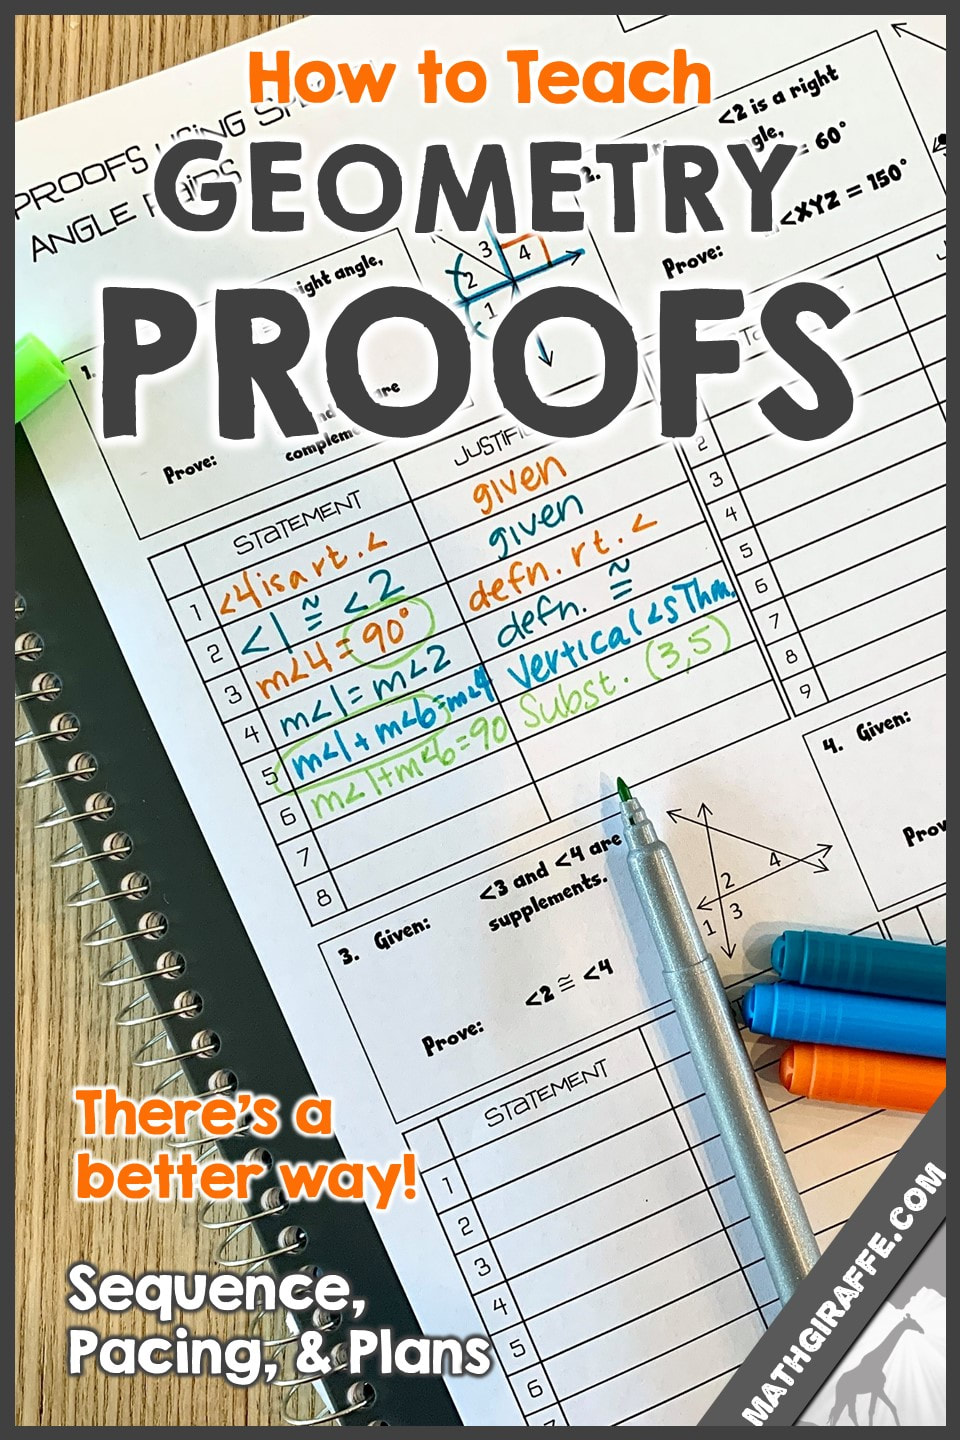
Sometimes they are successful, sometimes not so much. A huge challenge can be tackling two-column proofs, which are seemingly detached from practical life applications, for the first time. It can seem like a grueling task to teach and to learn. Here is some insight connecting to the Van Hiele levels for learning Geometry. If you know what makes this subject difficult and what level your students are currently at, then you can use these suggestions to figure out what you can do to help your students learn.
PART 1: So, Why is Teaching (& Learning!) Geometry So Difficult?
Not enough proving in early education
The foundation for learning geometry doesn’t start in high school. It starts in elementary and middle school. Students need to learn how to start proving and explaining why things occur before they hit high school level classes. This helps lay the groundwork for geometry as well as other subjects in high school. If students were introduced to simple informal proofs and required to reasonably justify statements, they would be far more prepared for the formal proofs to come. Of course the specific geometry concepts wouldn’t be on the same level, but introducing the pattern of thoughts earlier is better. Students need to know how to explain, prove, and show why long before they are in high school geometry. Low Levels of Conceptual Understanding We all know that a semester flies by. Teachers aren’t able to spend the amount of time needed to truly cover all levels of understanding needed to be successful. More than that, because geometry concepts aren’t being introduced early, there are always some very confused students. While some students can pick it up easily, others are left grasping at straws of understanding. The Van Hiele levels help us get a better grasp on this lack of understanding that too many students experience. The Van Hiele Model is a theory which describes how students learn geometry. It is based on the doctoral work of husband and wife, Dina van Hiele-Geldof and Pierre van Hiele. According to their model and other research, students enter geometry with a low Van Hiele level of understanding. Learning complex concepts like proofs require a much higher level (level 4 of 5) and most students enter the class at a level 2 or 3. Students without basic knowledge or the ability to back up statements with reason are easily set up to fail in class. General Cognitive Development Even when notions of geometry are introduced early, some students just aren’t ready on a developmental level. Jean Piaget and his theories on cognitive development help shed some light on this. An individual needs to achieve the formal operational stage in order to understand, formally reason and build proofs. The problem with this is that some students haven’t reached that stage yet, since it can span from adolescence into early adulthood (ages 11-20). That means that if a student hasn’t reached that level of cognitive development, then it will be pretty hard for them to understand geometry. Even though there isn’t much we can do about this, knowing that it is a factor is important. 
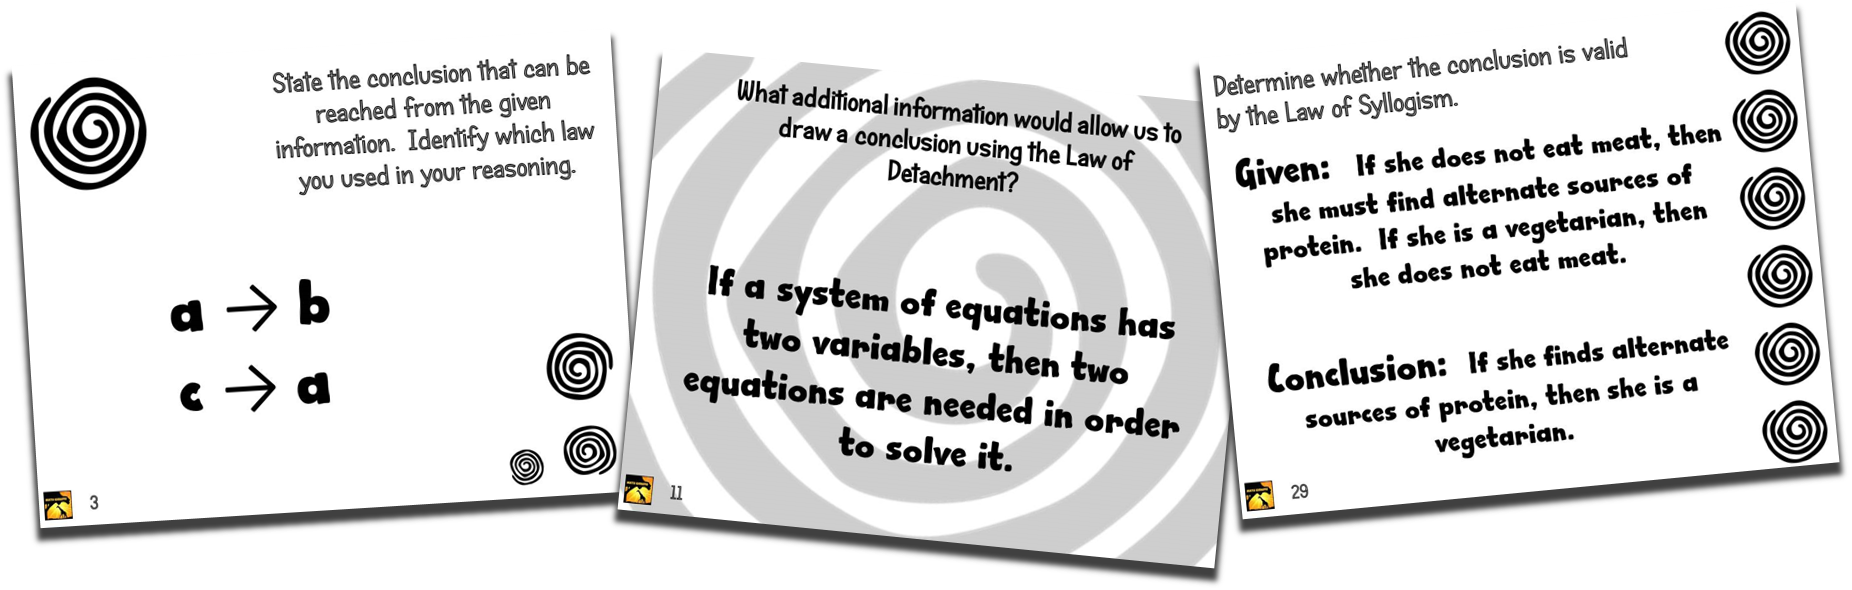
Part 2: About the Van Hiele Levels for Geometry Learners
The levels are based around the idea that students can understand geometry visually at a young age, then from there develop the concepts behind the properties to the point that they can first just identify, then think more abstractly about the principles. They get to the point of analyzing a figure or shape. Eventually, they then progress to the point of making deductions. Students at the higher level know how axioms, theorems, and converses operate enough to extend the properties. At the highest level, students are able to think like a mathematician. They realize that axioms are more arbitrary than concrete, and therefore can finally extend their thinking to accept non-Euclidean geometry.
A student’s level is based on his/her experiences, not age. Adding a series of experiences that allows students to interact with geometric figures helps them to move on to the next level. Another thing to keep in mind is that all the language and vocabulary that you use has to match the particular student level. Always use correct terminology, but be aware that if you do not support your students with explicit vocabulary instruction to be sure you are all understanding the terms as you use them, you’ll lose some students. Those who fall behind will only be able to memorize and scrape by. They will not fully understand, and this can prevent them from ever achieving the next phase / level. Even students of two different levels working together may have a hard time communicating about the geometric properties at play. Partners will need to be using the same level of vocabulary to work together effectively. 
Part 3: Ways to Teach Geometry for Deeper Understanding Using the Van Hiele Levels
As it goes with most learning, the earlier the better. A head start in the early grades is the only way to make sure students have a better van Hiele level when they enter high school geometry. It’s imperative that we improve basics of learning in elementary and middle school for abstract and relational levels. How can we incorporate this?
Geometry is a subject that builds upon itself. A student who is lost at the beginning is likely to be lost for the duration of their school career. That’s why it’s imperative to have underlying concepts taught throughout all education levels. Here are some examples of what you’ll see at each level, and the types of activities that will help students solidify their learning in order to pass on to the next level. 
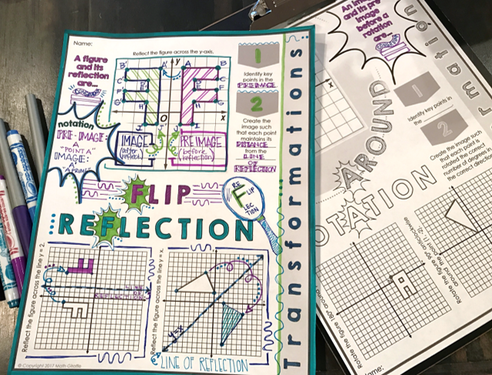
Level 0: VISUALIZATION
Understanding: The child can recognize and classify individual shapes based on classic examples. Thought Process: The shape is a rectangle because it looks like a box. Challenges: When figures are turned a different way or do not fit the “typical” visual presentation, the child may not think it qualifies (examples: The child may think that a very thin scalene triangle is not a triangle since it’s not the classic equilateral shape they learned. He/she may think that a square that is turned is not actually a square, but instead is a “diamond.” Activities for Middle / High Schoolers stuck at Level 0:
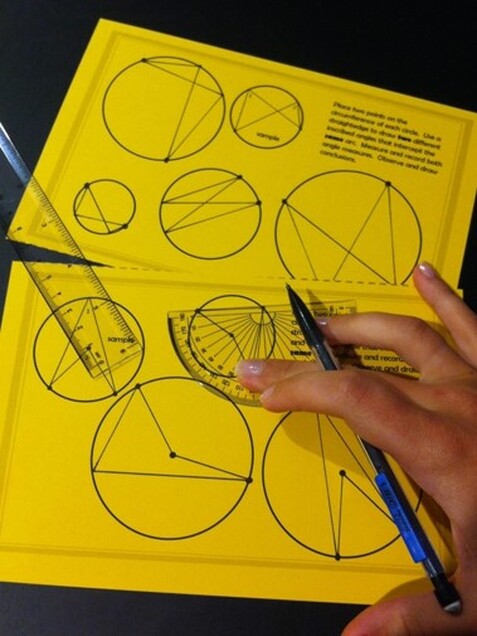
Level 1: ANALYSIS
Understanding: The student can identify figures, or components of figures. He/she accepts basic, separate properties of geometry. Thought Process: This set of angle measures is from an isosceles triangle because two of the measures are the same, and the sum is 180 degrees. Challenges: The student may have difficulty progressing from one property to another. The sequence of steps may be foggy, and the ability to “see” where to begin in a more complex figure or a problem that requires two properties may be lacking. Activities for Middle / High Schoolers at Level 1:

Level 2: ABSTRACTION
Understanding: A student can draw conclusions and is able to order and connect properties. He/she understands conditions and can begin to USE deductive logic, but does not yet understand the meaning of deduction or how to formally show a proof. Thought Process: This figure has two pairs of congruent sides, so it could be a rectangle or maybe a parallelogram…. Ah, but there are no right angles, and opposite pairs of angles are congruent, so it must be a parallelogram. Challenges: The student may have trouble extending a definition beyond its most basic interpretation. It’s difficult to explain or follow a deductive reasoning sequence that represents a formal proof with many steps. Activities for Students at Level 2:
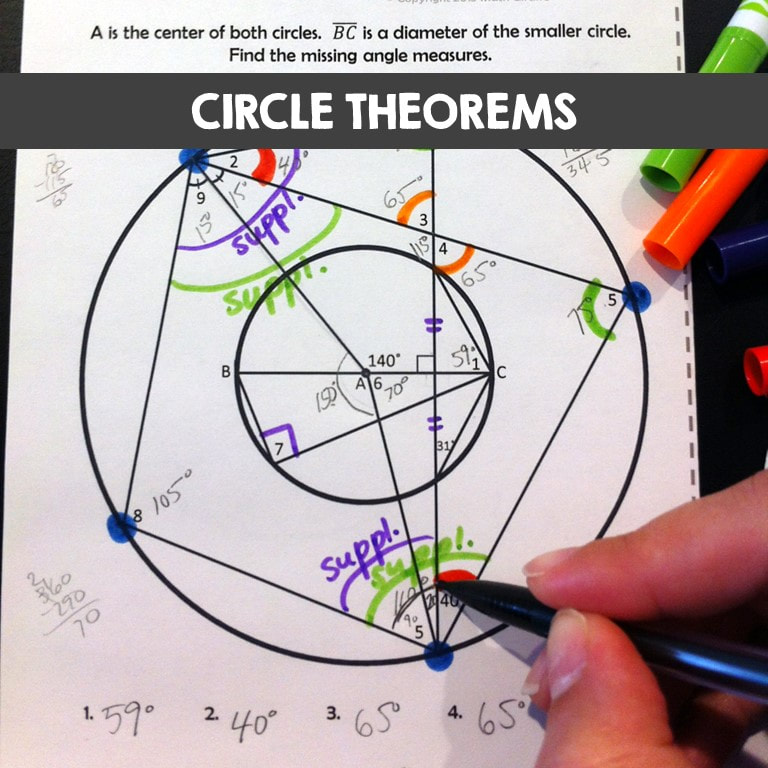
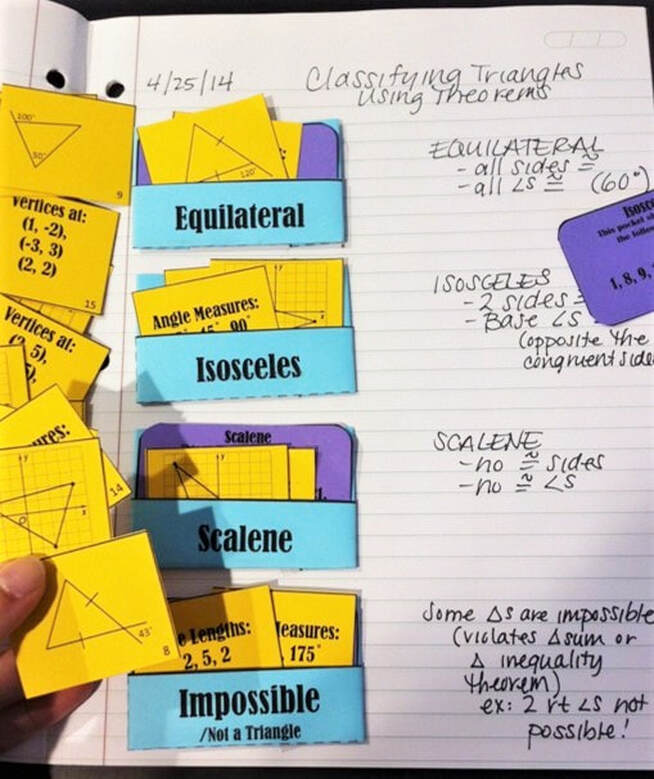
Again, be sure to include a variety of input information. Use some cards with diagrams, some with word explanations and definitions, and some with measurements so that students get a blend of practice with all forms and can build mental connections. 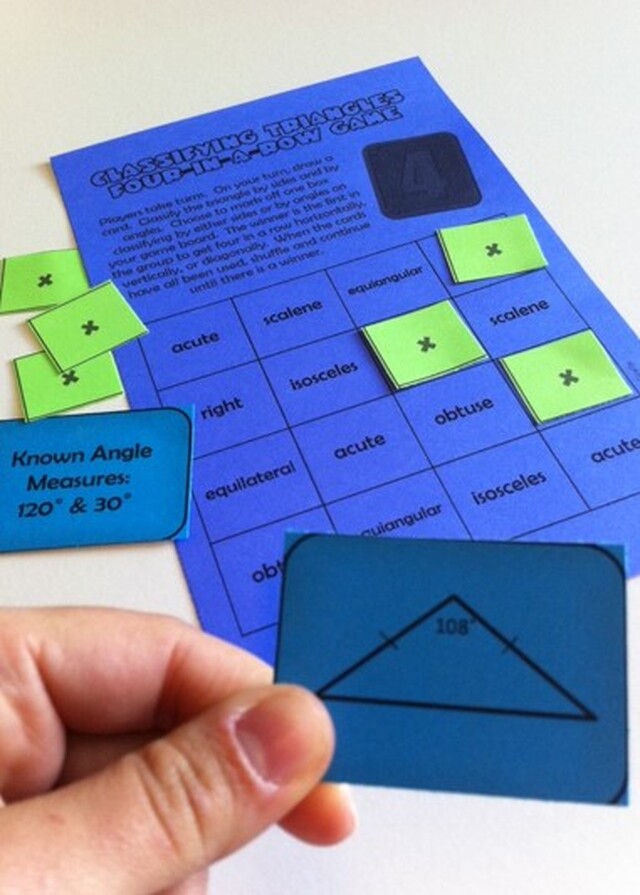
Level 3: DEDUCTION
Understanding: The student has a grasp of reasoning & logic and can communicate this to others. He/she is able to construct formal proofs. Thought Process: Since a implies b, and b implies c, then a implies c. In this case a is true, so I can conclude that c must be true as well. Challenges: Students in phase 3 understand theorems, undefined terms, definitions, and axioms, but have a fixed view of them. They see axioms as concrete and have difficulty comprehending non-Euclidean geometry. Activities for High School Students at Level 3: 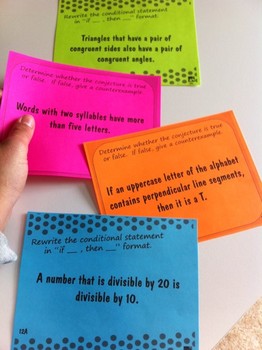

Level 4: RIGOR
Understanding: The grasp of geometry has been extended to the level of a mathematician. The student has an understanding non-euclidian geometry and is able to compare the study of geometry to other areas. (Most of our high school students won’t get to this level yet.)
You can’t just throw a baby into water and expect them to know how to swim. They need to see the water, touch the water, practice and experiment with and experience it. Then they slowly learn the more complex aspects of swimming such as floating, manipulating limbs to move, holding your breath under water and so on.
That is much like geometry. Students who have never had an actual understanding of the basics in geometry are going to be lost. They can easily drown in the onslaught of information that is geometry. No matter what level of math is taught, at some point a lesson that includes basic geometry is not only needed, it’s crucial. Be sure to give your students the time, space, and solid practice that allows them to progress from one level to another! For more tips on teaching math, updates, and resources, enter your email here:
To Read Next:
|
Archives
December 2023
Click to set custom HTML
|

 RSS Feed