
|
1/27/2015 18 Comments Grading Math Notebooks
I have tried doing a section for warm-ups in the past, but ended up switching to printed paper warm-ups. I found that it was worth printing them, because the kids took it so much more seriously. They tended to just give up and wait instead of trying if they knew that the warm-up would not be collected right away.
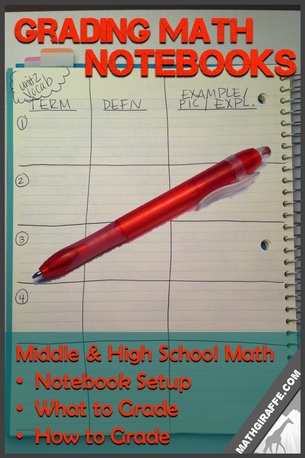
Setup
I think it's so important to set the stage and show that the notebook is a valuable resource and should be well structured, well maintained, and well used as a reference.
On the first or second day, take time to walk students through the setup. It can be a 3 subject notebook where they label the sections, or it can be a regular notebook that they separate. I like to hand out the firm, clear post-it tabs. They can stick these in the sections, then easily move them around as one section grows larger than the others. This prevents wasted pages when one section does not get filled up. Be sure that students label the outside with their names and class periods, and the inside with the section names. I do not require dates. Be clear from day one that these will be graded. Students need to know that you take the notes seriously. BIGGEST TIP:
After carting 150 notebooks home in enormous plastic bins every quarter as report card time approached, I made a breakthrough. I decided to do notebook checks DURING A TEST. This was such a simple change that made all the difference.
It really does not matter if the notebook check comes two weeks before the end of the quarter, so I just choose the unit test that is closest to the end of the grading period. This spreads out the checking dates for different classes. I just have students leave the closed notebook right under the desk and I walk around and grab each one and scan through it while they quietly take their tests. This way, students never have to part with their notebook when they may need it, and I never have to spend time outside of school with the grading process. Vocabulary
I assign vocabulary for each lesson BEFORE any instruction. This becomes a standard part of homework. I require the term, definition, and an example. The example can be a picture, a sample problem, or a sentence. Students make different choices for this depending on the type of word.
Read about teaching vocabulary using root words here. 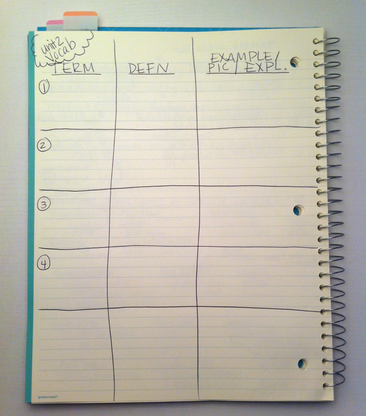
Notes
During any direct instruction, I expect students to take notes. They must record the examples and other notes that I give. Later during practice for a lesson (or even a week later), I say "check your notes" when they ask certain questions. Middle and High School students really need reminders to use their notebook as their first resource. I try to train them to reference it whenever they get stuck.
Homework
Homework is checked daily, so although it lives in the notebook, it is not part of the notebook checks. See my post on grading homework for details.
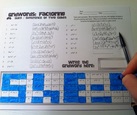
GRADING
I give a total of fifty points for the notebook each quarter. I let students know that this is a way to get points for doing what they are supposed to be doing. It can either boost the grade at the end of the quarter or hurt the grade. This really does keep them pretty motivated. I keep a list of each section of notes that should be present in the notebook and quickly flip through to verify that the notes are there. After looking at the first three notebooks, the rest usually take only about two minutes per notebook. I can quickly tell if something is missing.
If a section of notes is missing due to absence, I jot down what is needed and subtract two points. I allow that student to bring it to me any time before X date to show me that they worked with a friend to make up the notes for the lesson. (I know this is generous, but when students miss a day, they tend to get behind and make up the homework while neglecting the notes. I prefer that they go back and look over the lesson they missed and add these notes.) If they take the time to fix it up and come show me, I erase the old grade and add back the missing points. As far as vocabulary, each student is generally either conscientious about doing it, or is missing almost all of it. I subtract points for this accordingly, and give lectures about how this affects the grade. We talk about shaping up for the next quarter! 
To get freebies and email updates, subscribe in the sidebar.
To Read Next:
18 Comments
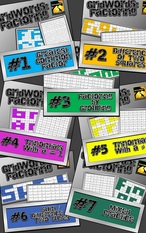
Don't Spend Your Sunday Hunting for Lesson Materials
Classifying Polynomials
Adding and Subtracting Polynomials
Multiplying Polynomials
Dividing Polynomials
Factoring Polynomials
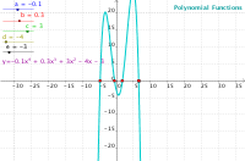
Polynomial Functions
To Read Next:


1/12/2015 6 Comments Introducing Derivatives
Let your Students be Surfers for the day.
Get the class excited. They are at the age where teachers do not bother to do this for them much anymore. It will not take you much effort to make this really memorable for them, so go big!!
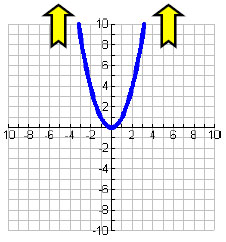
When you are ready to jump into the lesson, start with a large graph. A quadratic function works well. Draw or find a graph of a parabola that opens downward, since that is the easiest to compare to a wave. Demonstrate how the surfboard can travel along the curve. Explain that its slope at any point is the derivative of the function at that point. Resource #1: "Function Surfer" Applet for Derivatives
Project this "Function Surfer" applet on the board or let students explore in pairs if you have the technology for everyone. This applet is great for them to play with while they explore the surfing analogy.
Resource #2: Printable Surfer Dude
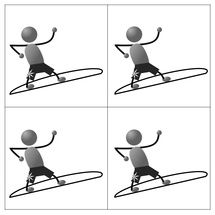
Here is a little surfer man I put together for students to use. Ideally, you want to print this on a transparency so that he can "ride" along the graphs on worksheets and students can still see the curve. If you cannot do that, just print on regular paper and have students cut along the straight line at the bottom of the surfboard. Click on the image to download the PDF. Four surfer dudes print per page.
These guys are great to use along with Resource #5 below as the "straightedge" needed in the inquiry activity.
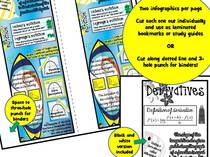
Resource #3: Derivative Infographic
Connect With Physics
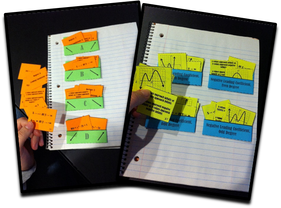
If all your students happen to be taking Physics, try collaborating with the Physics teacher to make the connections. If not, just incorporate it in your own classroom. I think the best way for students to really understand the relationship between each derivative and the rate of change is to work with position, velocity, and acceleration.
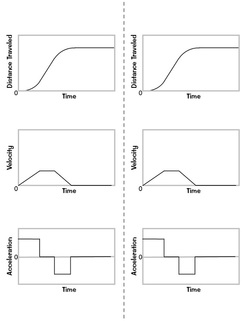
Show a position graph and explain what it represents. Write "position" on the board. Ask students to come up with a word for how quickly position changes. Write "velocity/speed" below the word "position." If they need help, act it out. Walk slowly, then fast across the room. Then ask "Ok, is there a word for how fast the velocity changes? Have them think about slowing down and speeding up when driving. Write "acceleration" below "velocity" on the board. Display or hand out graphs for position, velocity, and acceleration. You can even talk about "jerk" as an opportunity to go one more level to incorporate a third derivative. The key here is getting students talking out loud or writing in complete sentences. Try to get a real discussion going. Encourage students to clearly verbalize the relationships. Have them look at the position graph and talk about it. You need them to speak out loud and hear classmates say plenty of statements like: - "The car must be going faster here because the position is changing more quickly than it was." - "When the velocity starts increasing more quickly, this means that the acceleration is increasing." - "The car is driving at a steady rate (constant velocity) when the position graph is linear. The slope is constant, so the position is changing at a constant rate." - "The car is stopped when the slope is zero. The position is constant." Have students take time to really look in-depth at each graph and point to the different intervals and explain out loud. Make connections by labeling the position graph f(x), the velocity graph f'(x), and the acceleration graph f''(x). Start using the words "first derivative" and "second derivative" to introduce the new vocabulary. Resource #4: Position, Velocity, and Acceleration Graphs
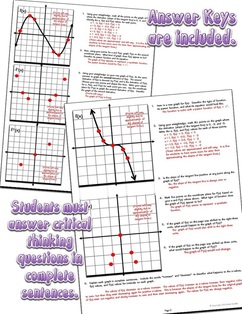
Resource #5: Inquiry Activity: Graphing the Derivative of a Function
I hope your students love the derivative lessons! Enjoy!!
To Read NExt:


|
Archives
December 2023
Click to set custom HTML
|


 RSS Feed