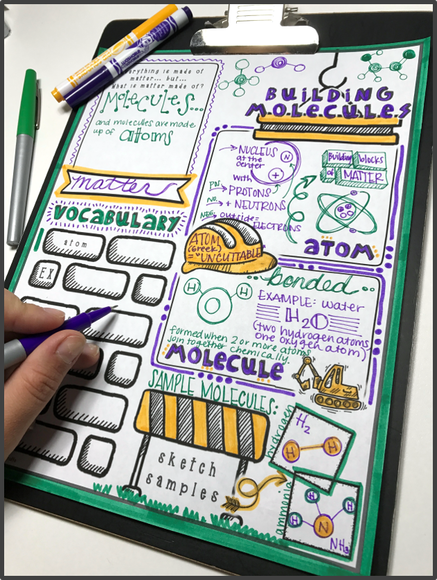
15 Easy Ways to Use & Make Doodle Note Templates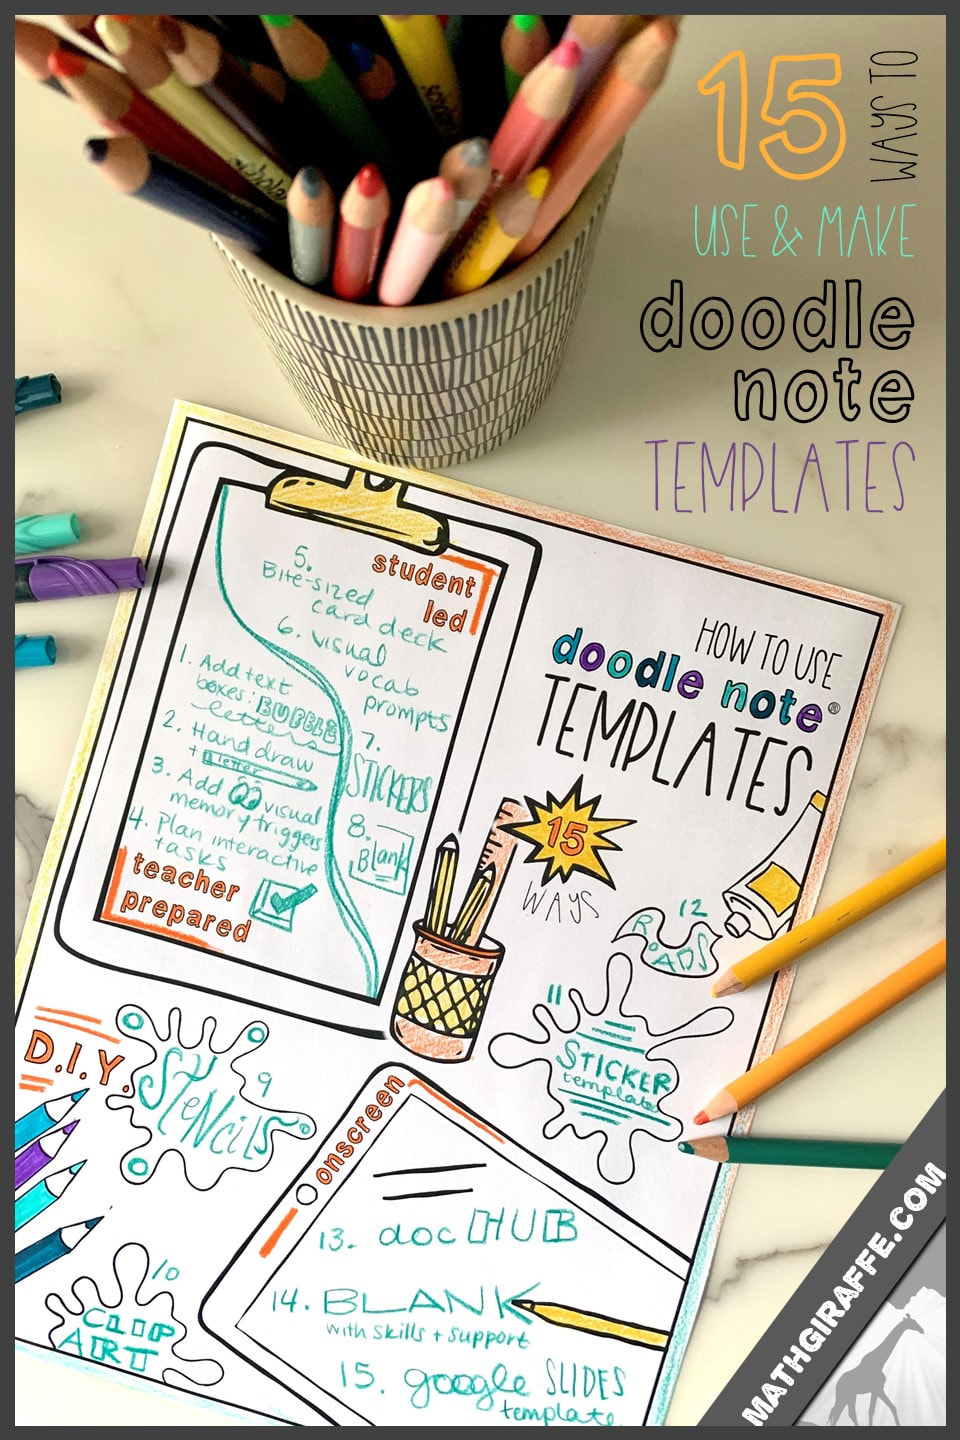 Let's get straight to the specifics. I know you have no time for monkeying around right now. We need to be able to use the resources we have as easily as we possibly can. This post offers a set of solutions for using simple templates in a wide variety of ways. Print this post out, and come back to it any time you need to give your students the amazing brain-based learning benefits of visual note-taking, but do not have time for much prep. For background on WHY to use the doodle note method, visit doodlenotes.org (I won't add all of that neuroscience, reasoning, and examples here, for the sake of time and space, but please do check it out and take a deep dive into the world of doodle notes if you are not familiar with it yet.) You can hear from teachers, download a free handbook, and get a lot of other resources over there to help you get started. I've broken this down into three main categories: PRINTED PAPER DOODLE NOTE TEMPLATES (both teacher-prepared and student-led with no prep), ONSCREEN DOODLE NOTE TEMPLATES, and D.I.Y. TEMPLATES that you can make yourself so they are super-customized to just what you need for your lessons. At the bottom of this post, I'll put links to a variety of different templates and resources that you can use, but I'll link each picture throughout the post too, so you can click on an image for the templates you see in action. 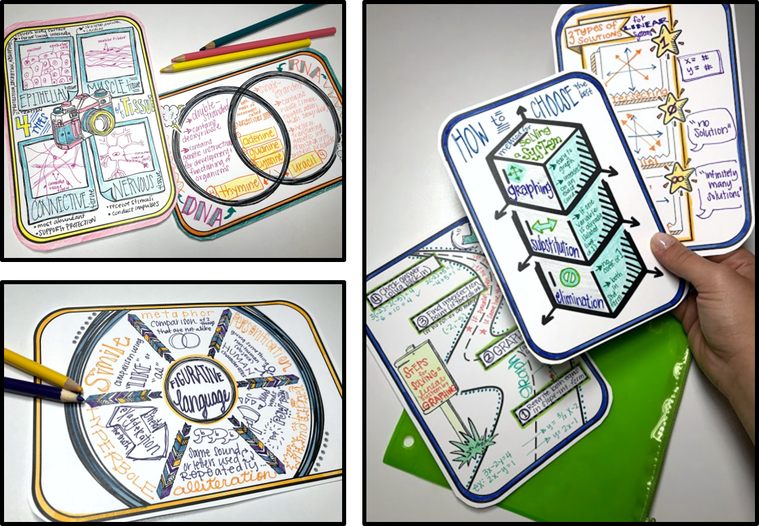 PAPER & PENCIL DOODLE NOTE TEMPLATESIf you have time for just a minimal amount of prep work and want to customize your doodle note lesson template, start with these Teacher-Prepared Ones (#1-4): 1. ADD TEXT BOXES - Insert your doodle note template (either one you downloaded for free, purchased, grabbed from the Resource Zone in the Doodle Note Club, or made yourself) as the background on a PowerPoint slide. The JPG image file can easily be inserted as a picture. Just stretch it to fit the full 8.5x11 slide page, and it will become a backdrop. Add a bit of teacher input to offer some structure and guidance for students. You'll want to create some titles and subtitles to organize the page. Just insert text boxes right on top of your doodle note template background image. For these big idea text boxes, use a bubble letter font that students can color. I have some font suggestions below, but you can also convert a regular font into a bubble font by following these directions: - Select a font that is bold / heavy. - Type your topic / subtopic / key vocabulary term (Don't use this for longform text. It's best to have students only color the important words and ideas so they "stick" in their brains without having them color smaller letters all day long.) - Set the "fill" for the text to white. - Set the "outline" of the text to black. (The text itself, not the text box.) - Adjust the weight of the outline if needed. You may also want to add some directions or small notes. For anything more than just a word or phrase, use a regular, readable font and small type. Once you have added the teacher input that you wish to provide, you can save your template as a new lesson file, now that it's customized. Save as a PDF, or print it to distribute to students. From here on out, you'll follow the standard implementation tips and best practices for the doodle note method. You've created your own doodle note lesson using a template! Click the font image below to get a linked version that leads to each free downloadable font. 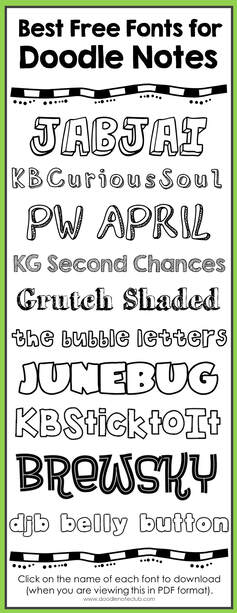 In the example below, you can see that the teacher input (added with text boxes) included key ideas and organizational info to support students as they complete the visual notes. The title, "Building Molecules," is typed in a font that kids can color. The key ideas, "atom" and "molecule" are also written in a way that they can be colored or embellished creatively by students. Simple directions, like "sketch samples" are included as well, so students know what information goes where, and where they will need to complete interactive tasks. (For more information on setting up room for a variety of interactive tasks within a doodle note lesson, visit this post.)
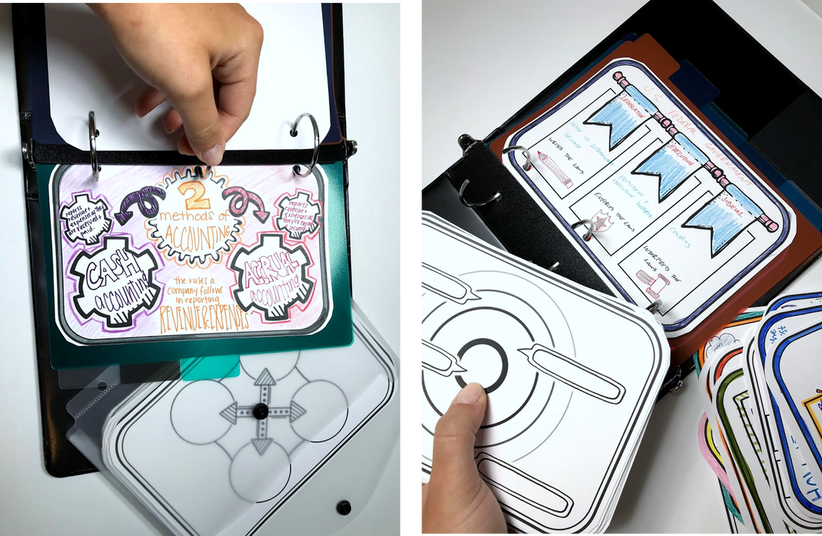
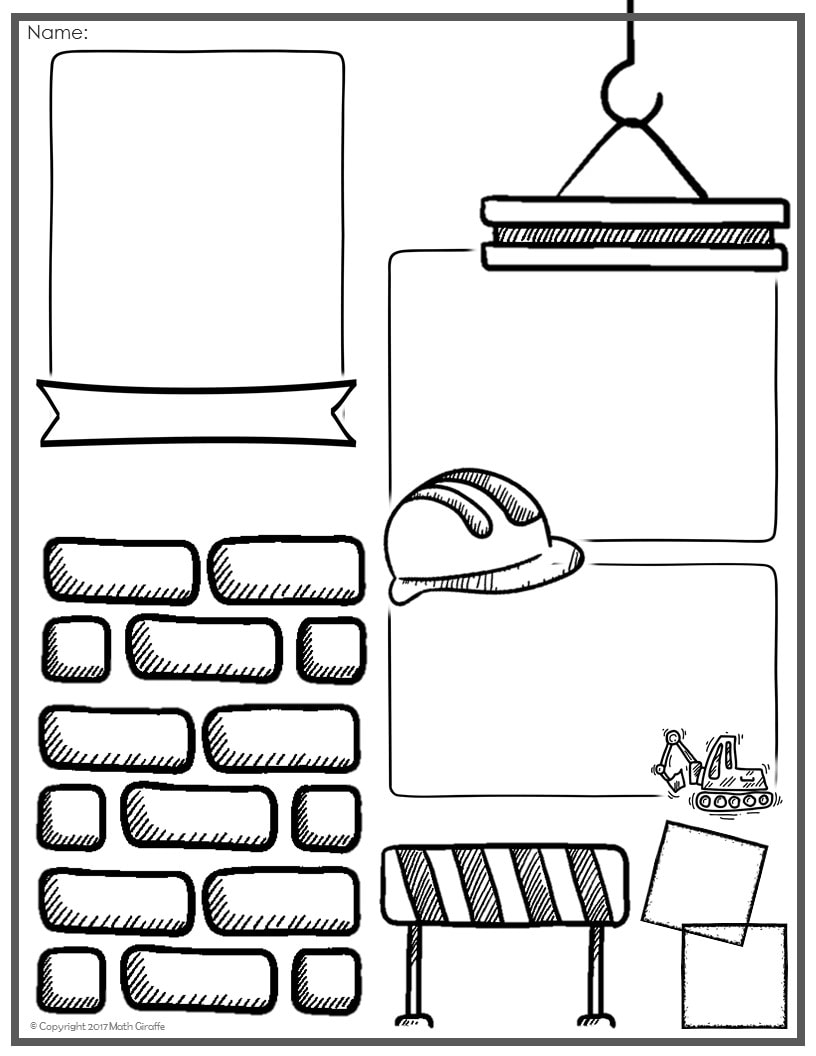
2. CUSTOMIZE BY HAND - Print a doodle note template that fits the structure of the lesson you are teaching. Narrow your choice by number of subtopics, and the relationship between the ideas.  Once you've selected a template that works well for the content, print it out as it is. Grab a thin pen or marker, and add your teacher input by hand. You can doodle a visual memory trigger, create your own headings with bubble letters or hand lettering that students can embellish, and you can even add some handwritten directions or the beginnings of the guided notes. This method can be quicker for some of us who hate to fiddle around with the computer version. It can often be easier to just print it and add your little bits of text or imagery by hand. Then, just scan / photocopy, and distribute to students! They will add their own notes, draw and sketch, label, color code, and contribute other creative input as they take notes during the lesson. For tips on how to implement the lesson once you have customized your template, revisit this post: How to Teach with Doodle Notes: Best Practices 3. ADD IMAGES THAT ACT AS MEMORY BOOSTERS - Whether you add any text as teacher input before distributing or not, you may want to insert some imagery that will help students make connections and remember key ideas. Here are some tips for finding and inserting doodle note-friendly graphics. One of the greatest places to find images that work well in doodle notes is an icon library. Often, icons will fit your needs because they are designed to represent certain concepts or ideas. They are great at transferring information through a picture, and they are usually black and white, or easily converted to black and white. Another great place to search for specific images is openclipart.org. While you browse the free images, keep in mind that the best images for graphic guided notes are black and white or are easily converted to black and white, have simple designs, and ideally have open centers when you want students to write inside the shape or image. If you are looking for custom-created images specifically for inserting into doodle note lessons, check out our Doodle Note Club. We have specially designed graphics sets that show relationships between ideas, offer visual analogies, and help structure information in a clear way for lesson notes. These samples below show a few samples of the sets that are available in the Doodle Note Club. You'll notice that they have empty centers to allow for student notes that fit the flow of the shapes. This allows students to easily represent concepts and show the ways that the lesson ideas relate to one another graphically. 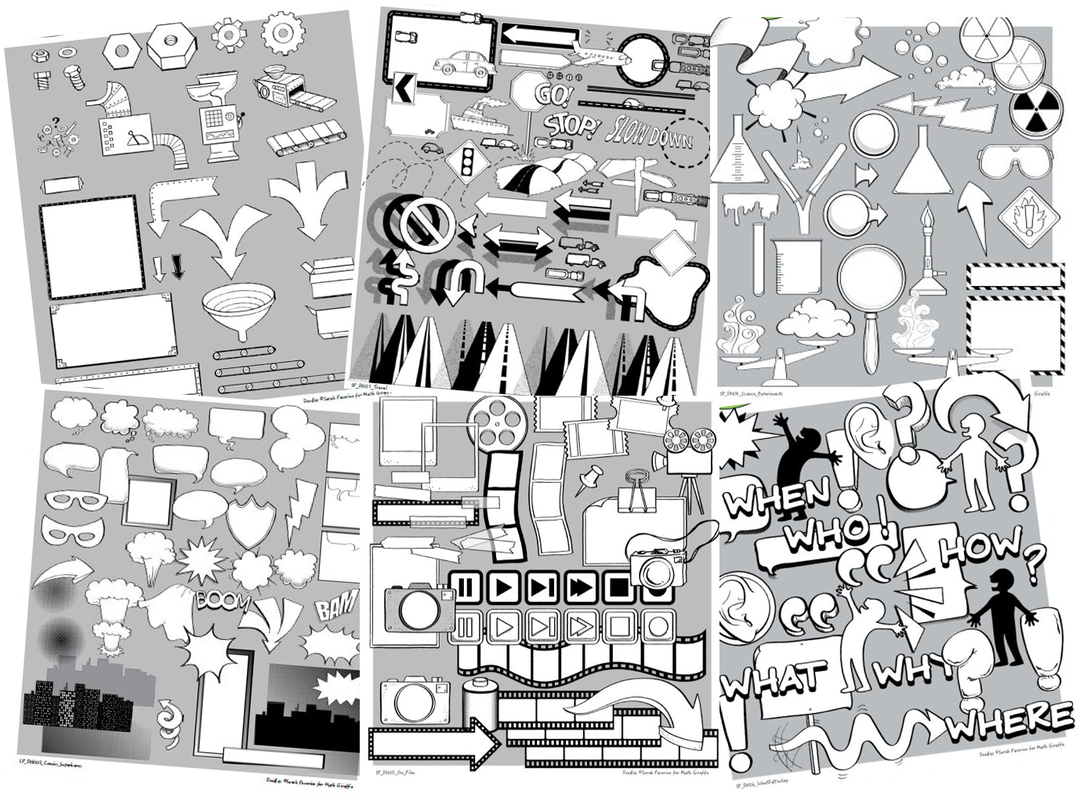 Sometimes, you'll need to tweak your images to make them more interactive for students. It's nice if they can write inside the shape, and if it layers well with the other elements on the page. Within PowerPoint, you can convert many images to black and white by following these steps: - Start by inserting your template as a background. - Insert the graphic you want to add on top. - Right click on the graphic and get the options to "Format Picture." - In that formatting toolbar that appears, you should have the option under "color" to "Recolor." One of the black and white / grey and white options will usually do the trick. If your image has a messy background, and you wish it was just the central part of the clip art, you may want to try playing around with the "Remove Background" tool in PowerPoint. Depending on the image, it sometimes quickly and easily "cuts out" the shape you want to feature and removes the clutter. However, it can be a major pain if it's a tricky image, so if you find that you are having to mess around with repeatedly showing it which regions to remove and which to keep, give up. It can end up wasting a lot more time than you realize. Just choose another picture instead. If the image is transparent, and something behind it on the template is showing through where you don't want it to, follow these tips: - Insert your graphic, and get it in the location you want, and the size that you want. - Add a white-filled shape with white outline (or no outline) and drag it to be about the same size and shape as the graphic. (Use a circle/oval if that will best cover it, or a rectangle or other shape if that is the best approximation.) - Right click on your new white shape to send it back behind the graphic. PowerPoint has different layers, so your template will be in the "back," and whatever you most recently added on top will be in the "front." You want your white shape to be between the background template layer and the clip art image. - Add a white "glow" around your graphic using the formatting toolbar to cover up any difference in shape between the graphic itself and the white layer you added to cover up anything that was peeking through your graphic. Likewise, any time a doodle note template has an extra box, image, or section that does not quite fit your needs, you can effectively "delete" it by covering it up. Just add a white rectangle or circle over the portion that you do not need. Then, you can leave that area blank, or insert a shape or image that better suits the lesson content. You can also add a white shape on TOP of the graphic, if there is visual clutter in the center of the clip art image, but you want students to be able to write or sketch within the image. For example, this bridge had black lines of wood grain across each plank, but by adding white rectangles, it became interactive. Now, students can do their lettering across by writing a letter in each plank. The bridge clipart was also cropped down to have the correct number of planks for the number of letters that would be needed for them to write "reasoning" within the image. 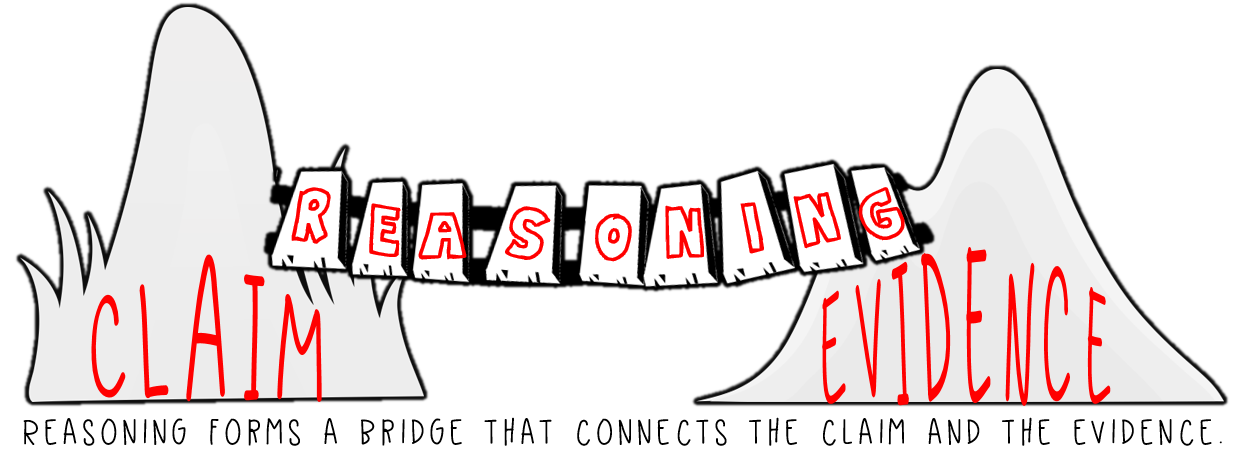 4. PLAN INTERACTIVE TASKS - In addition to making your key words bubble style so students can color them in, consider other interactive tasks they can do. Any time you can have students sort, classify, color code, sketch a visual reminder, or integrate words with pictures, you'll activate the neural pathways that lead to stronger retention. Blending graphic information with linguistic information is always a great interactive task for boosting long-term memory. 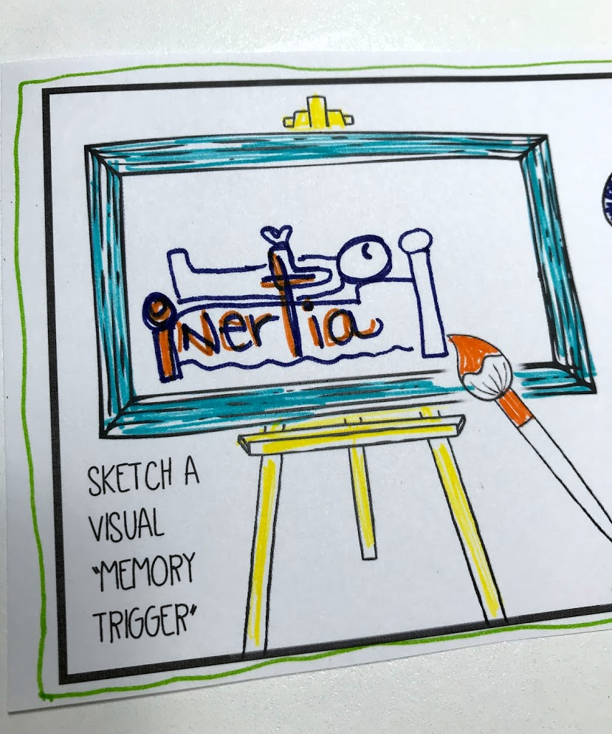 Other options for interactive tasks include filling in, labeling, drawing, and "to do / to doodle" lists. Here are examples of each. Be sure to embed a wide variety of as many as possible into each guided note lesson to get the most of the brain benefits of the doodle note method. 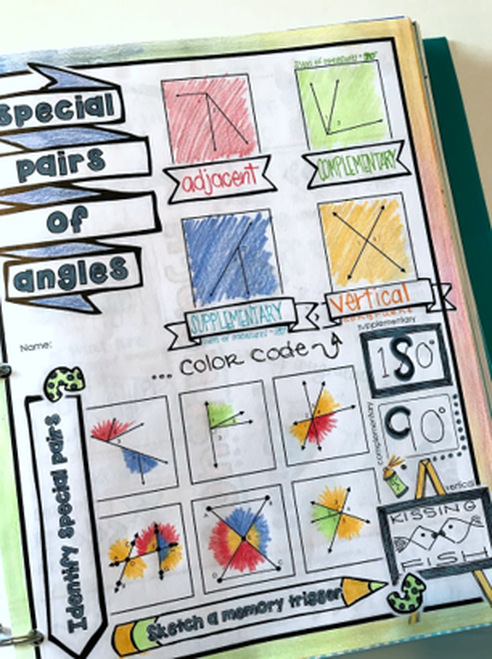 If you do not have time for any teacher prep (or your students are visual note experts by now and don't need as much guidance), these options allow you to just print and distribute! (#5-8): 5. OFFER A DECK OF DOODLE ORGANIZERS - A lot of students benefit from having smaller half-page, simple doodle note templates. This deck includes 100 different cards that teachers can have on hand. No prep work is necessary. There are a lot of ways that you can use these templates. These are intentionally designed to fit and organize JUST the key information. Require your students to narrow it down and limit themselves to just the key facts for each segment of the card. These fit right inside interactive notebooks, or can be pasted in binders or notebooks. (Storage tips and suggestions for use are included!) Have them create a card for each big concept, then keep them all for the school year and beyond! At the end of your school year, each student will have a big deck of concept cards to study from, prepare for a final exam, and then carry on to next year to use as a reference! 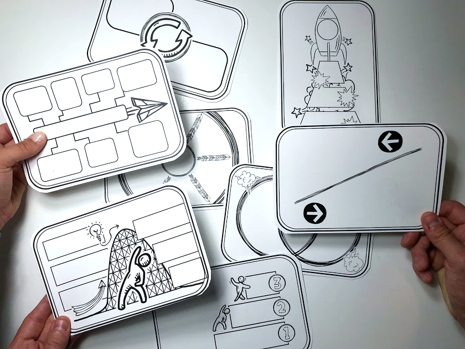 Options / ideas for using a deck of templates like this:
 This video shows a sample of interacting with one of the template cards. They're a nice small-scale version of doodle notes that are manageable for students. These are the top choice for a lot of special ed teachers. 6. USE VISUAL VOCABULARY PROMPTS - Use simple, small-scale templates to help students retain key terms with "visual memory triggers." Distribute small templates that act as mini vocabulary study guides that help students remember important words and ideas. The visual presentation helps them to organize the information, see connections, and convert the information to long term memory. 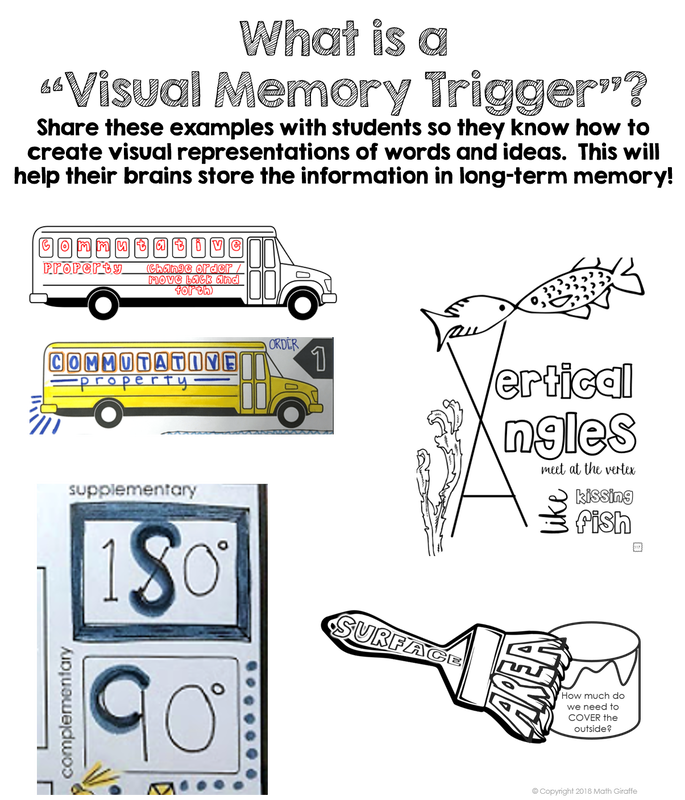 Once your students practice creating these "visual memory triggers," they will be able to do this for themselves, with or without a template. You can have volunteers come up to the board to share theirs the first few times they develop one for a new vocabulary word. Then, just allow them to create their own set of visual vocabulary for each unit. These prompts will help students get started, if they are not used to building a memory trigger from scratch yet. These guide them to think in terms of logos, artwork, and other ways that we BLEND the graphic and linguistic information. When we integrate the two into one image, we take full advantage of Dual Coding Theory. You can see more details about how to blend words and visuals to maximize the effect of Dual Coding Theory to help students process and remember information here. 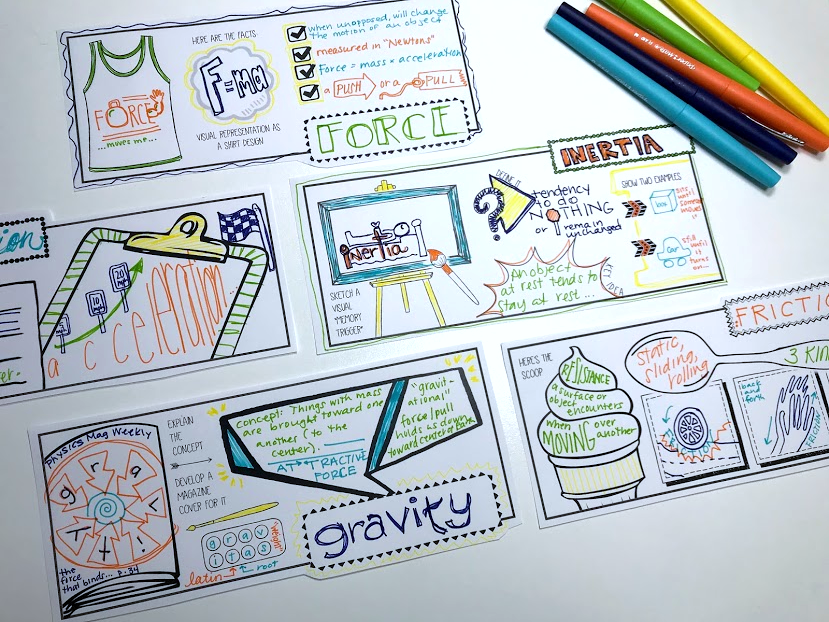 7. LET STUDENTS BUILD GRAPHIC NOTES WITH STICKERS - Convert any blank page in a notebook into a doodle note using sticker templates! On the back end as a teacher, again, all you'll have to do is print. No prep work is necessary. These downloadable doodle note sticker templates are free. By printing any half-page doodle note template (like the ones from the visual vocabulary set or the card deck shown above) on sticker paper, you'll have the makings of a student-created doodle note. Just distribute the stickers, choose how much guidance you'll give during the lesson, and have them structure their own graphic organizer right inside their notebook. They'll then add the notes, doodles, color, and creativity!  Another option is individual sticker graphics. These can also be printed as templates on full-page sticker paper. These allow students to cut out the pieces, peel, and stick. This is like a twist on the interactive notebook concept, but it removes the messy gluesticks and adds a splash of creativity. Activating both brain hemispheres together increases focus and allows students to learn the material more easily. 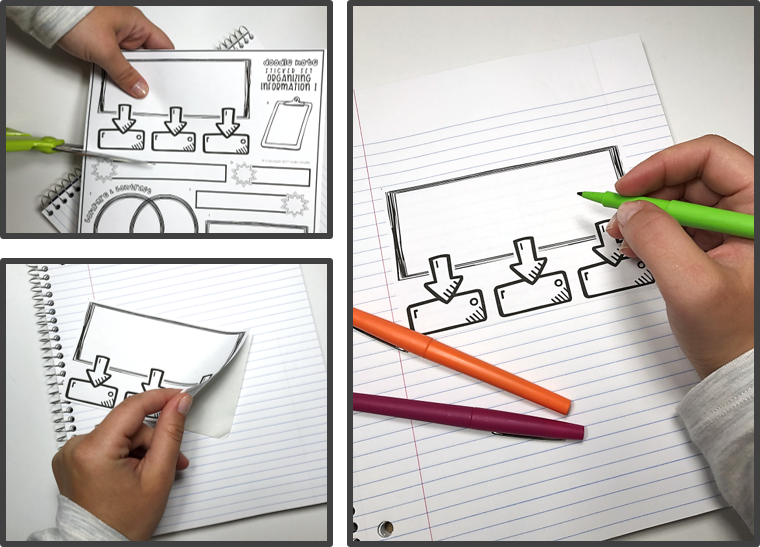 Here is a sample video showing how students can develop a doodle note right in their own notebook using stickers. 8. KEEP IT BLANK - Make it as simple as possible for yourself. Just hand out a blank doodle note template, and guide students to convert it into a visual note page all their own with their unique creative spin. As you model this and complete your teacher version, remind them to incorporate color and creativity to help activate their neural pathways! Try these free simplified doodle note page layout templates to give it a whirl in your own classroom. 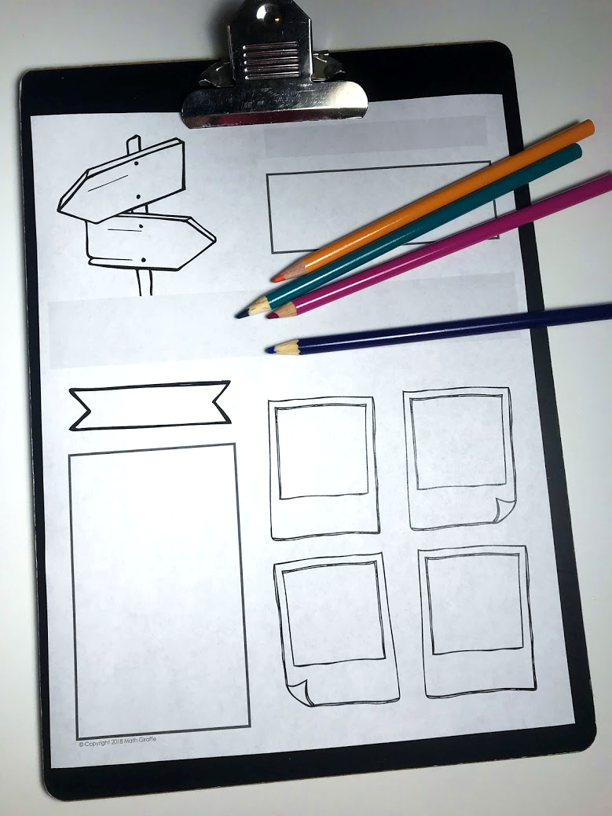 ONSCREEN DIGITAL DOODLE NOTESAnytime that you can possibly get real paper and coloring pencils into students' hands, do that. Please, please only replace your doodle notes with a digital version if you absolutely have to! Research shows that a lot is lost when students use tech instead of taking notes by hand. However, sometimes it's just not possible to get paper copies out. In those cases, you can use your favorite doodle note templates online with any platform that has on-screen pen tools and different color options in an overlay tool. Start with this full guide to distance doodle notes, then dive into these options below for more ways to use your doodle note templates (#9-11 for onscreen options) 9. USE DOCHUB - Convert your doodle note template to PDF format. (Hint: you can do this with your smartphone! Simply take a picture of the page, save it as a PDF, and email it to yourself.) Have students add the free DocHub app to their Chrome accounts. You should have DocHub on your teacher computer as well. Assign students the doodle note lesson (or background template that you have pre-selected to work well with the lesson content) through email or the online platform of your choice. Even if you don't have Google classroom, you can do this! Then, with their devices, students have easy access to the note pages. With DocHub, they can draw, write, highlight, and even insert text or images on their visual notes! 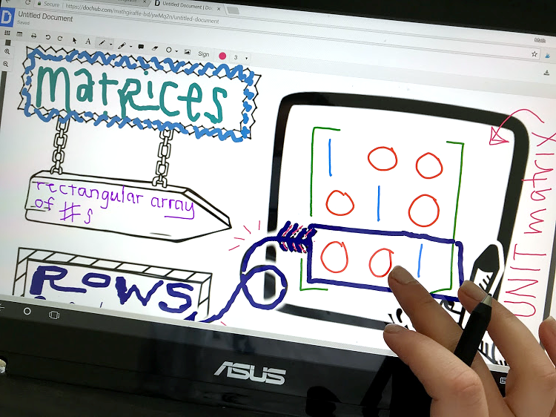 10. SKETCH FROM SCRATCH - If your students cannot print, or you cannot provide them with a pre-made doodle note lesson or a template, don't worry! Just have them get their hands on a blank piece of paper. Use these tips to do the rest. - Offer students this interactive guide to organizing information visually (It's free!) They can develop the different structures that they will need to create their own page layout that organizes the information visually. - Use these 5 Ways to Teach Visual Note Taking, which will set students up with the skills they need to build a sketch note from scratch. Then, you can provide them with a lesson, a video, or an informational presentation, and they can develop their own visual note. 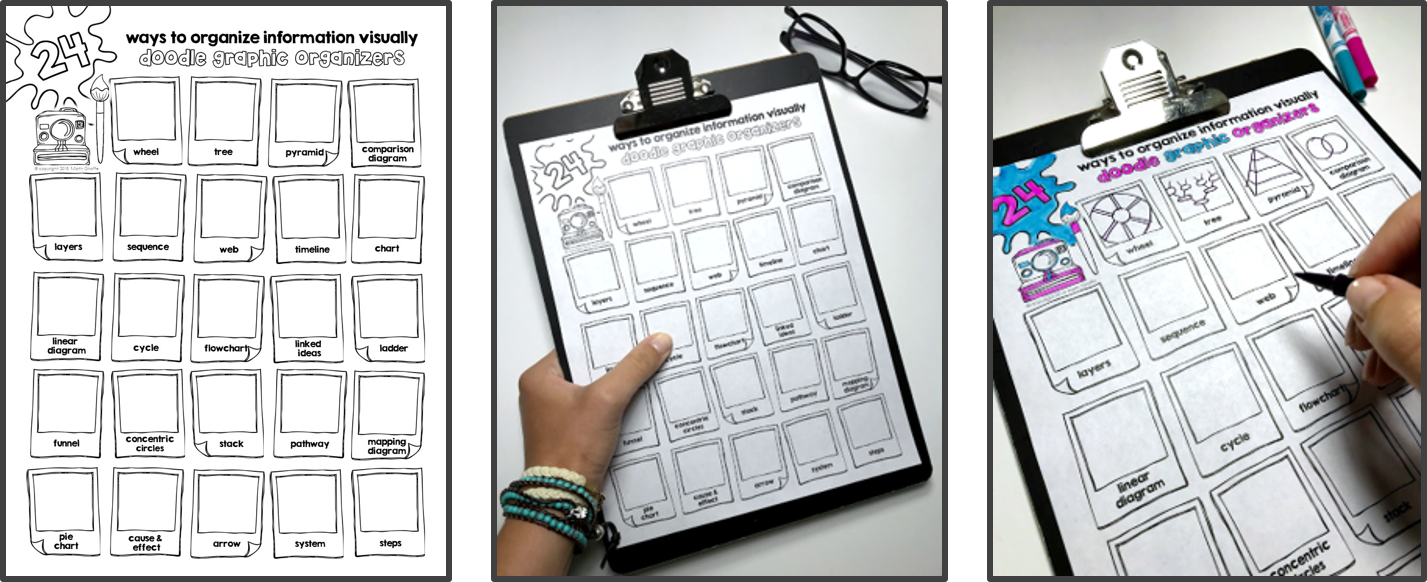 Once students do a few practice rounds with developing a structure, and adding creative visual memory triggers, they'll be ready to create their own graphic notes from scratch. This example video lays out how to convert a blank page into a customized note sheet on a topic with three interconnected subtopics. With any number of subtopics, and any different type of relationship between them, this could be customized differently. Students can reference their graphic organizer options, select the best layout for the content, and create their own visual notes in minutes. 11. SUPPLEMENT WITH GOOGLE SLIDES - Use this free google slide template to accompany any doodle note template. This helps your students to doodle while reading or watching content for any subject (and from any location!) Just add your own link to a video, text doc, or presentation that you'd like to provide as instruction, and the slides will do the rest. Your kids will be able to structure their blank page, add visual memory triggers, and practice their creative note taking skills while meeting your learning objectives. The guidance is all provided for them in this free slide template! 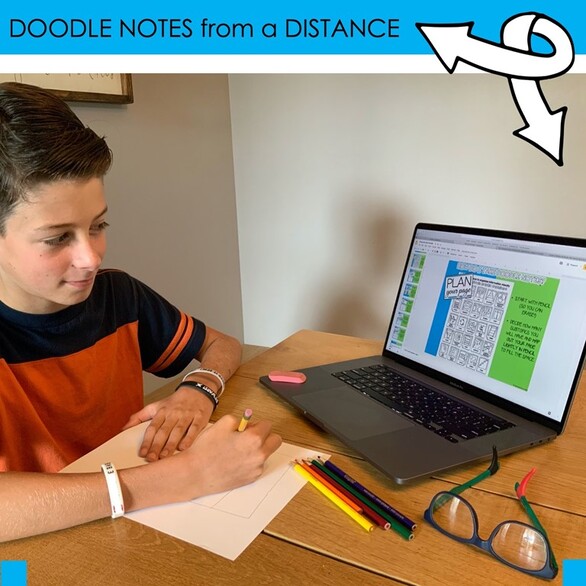 D.I.Y. DOODLE NOTE TEMPLATES - 4 WAYSSometimes, you just want to make do with what you've got instead of hunting for the perfect template, or you feel the urge to get crafty. Time to get creative! These options are perfect for you DIY folks! Go ahead and make your own! (#12-15) 12. STENCILS - Grab a couple of simple stencils with basic shapes, a blank piece of paper, and a pen! What's great about this method is how customizable it is. Do you need 7 subtopics that all point to one central theme? Or some odd combination of ideas that interconnect or stack up in a way that none of the templates really reflects well enough? No problem - just lay it out yourself! It's a fun, crafty way for those of us who are not so tech-y to just do it with our own two hands. This video shares how to DIY your own doodle notes by hand. 13. CLIP ART - For those of you who are more tech-oriented, on the other hand, it may be more appealing to move the shapes and images around onscreen instead of by hand. To do this, I recommend PowerPoint. Add shapes, icons, and clipart images, and you'll be able to move them and layer them smoothly in there. It's more manageable than a lot of other software options when you want to use both text and images together. You can make those bubble letters as described above, turn and curve text, and embed words right inside or over the top of images. Everything is still compatible, and the graphics and words layer perfectly with little effort. PowerPoint also has a lot more options that Google Slides for cropping, formatting, editing, and adjusting everything. If you plan to do this a lot, our Doodle Note Club is loaded with value and may be worth it for your needs. We have sets upon sets of custom-made graphics that you can insert on your doodle note lesson pages. You can use our templates or create from scratch really quickly and easily, because all the clip art is designed specifically for developing doodle note pages. The pieces fit together so well and can be layered to make the perfect layout for whatever your own lesson content needs as far as structure. 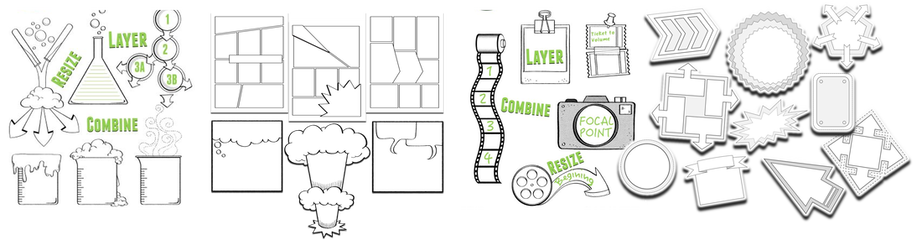 Here is a video sample of how you'd use those resources to build a custom visual note: 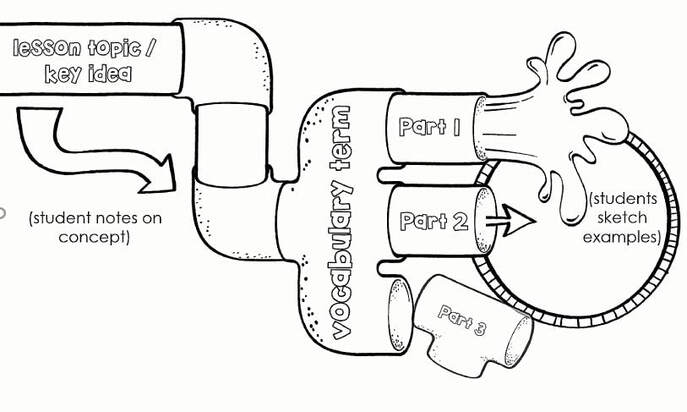 14. ROADS POSTER / TEMPLATE PACK - Use pieces of roads the same way the pipes are used in the above clipart sample. You can draw this by hand, or check out the template set here. You can set up a unique layout based on the flow of your lesson content. This works really well with any kind of content that fits into a flowchart, a timeline, or a series of steps to follow in sequence. It's especially fun if you do it in a poster-sized large format, and let kids build a giant doodle note together using the template you create. 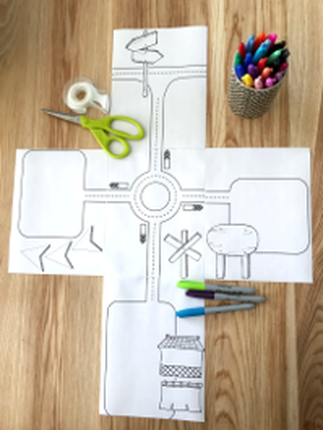 Just lay out the roadwork according to the number of subtopics you need for the lesson you are teaching. You can quickly build the perfect flow to represent the relationship between the ideas, and then hand it over to the kids. They'll go from there, and interact creatively to complete a gigantic doodle note as you guide them through the lesson. 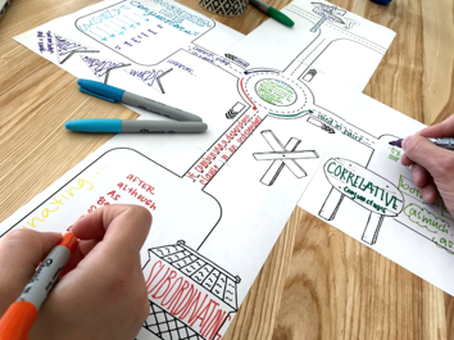 15. STICKERS - (on the teacher end this time). Even if you don't want to offer your students stickers for their notes (see #7 above), you can get just enough sticker paper for yourself and use them on the back end to prep a DIY template. Build your own doodle note template using the doodle note stickers, and then photocopy it once you've got the layout you want. You can download a free pack of doodle note stickers here. This works really well if you need to differentiate the amount of guidance in your note sheets. Crank out a quick structural template by laying out some doodle note stickers, and then make a set of photocopies. Then, add some additional teacher input / guidance. Write in some subtitles, some directions, fill in the blank notes, etc. to support those students who need a bit more guidance and structure. Then make some more photocopies. Now you'll have two versions. One blank template with just the framework or outline copied onto it, and one more guided option that offers additional support! PRE-MADE DOODLE NOTE TEMPLATESHere are links to some of the resources shown above. Some of these are free, and the best value by far is the Doodle Note Club membership, because it includes ALL of these. Doodle Note Templates Bundle Deck of 100 Bite-Sized Doodle Note Template Cards Free Simple Doodle Note Templates Doodle Note Stickers - Full Set Free Doodle Note Stickers Roads Template Kit Free Google Slides Supplement Visual Vocabulary Prompts Free Organizing Information Visually Chart Doodle Note Club (includes ALL of the above: all templates, stickers, cards, and resources shown, plus custom clipart!) MORE SUPPORT & TIPSFree Doodle Note Handbook Free "Engage Your Brain" Doodle Notes to Introduce Visual Note Taking to Students Tips for Implementing the Doodle Note Method More Posts About Using Doodle Notes FAQ: Using Doodle Notes FAQ: Creating Doodle Notes FAQ: The Doodle Note Club GET STARTEDIf you are interested in the doodle note method, click here to subscribe by email. I'll send tips, free resources, and doodle note posts to your inbox that will help you get started easily!
8 Comments
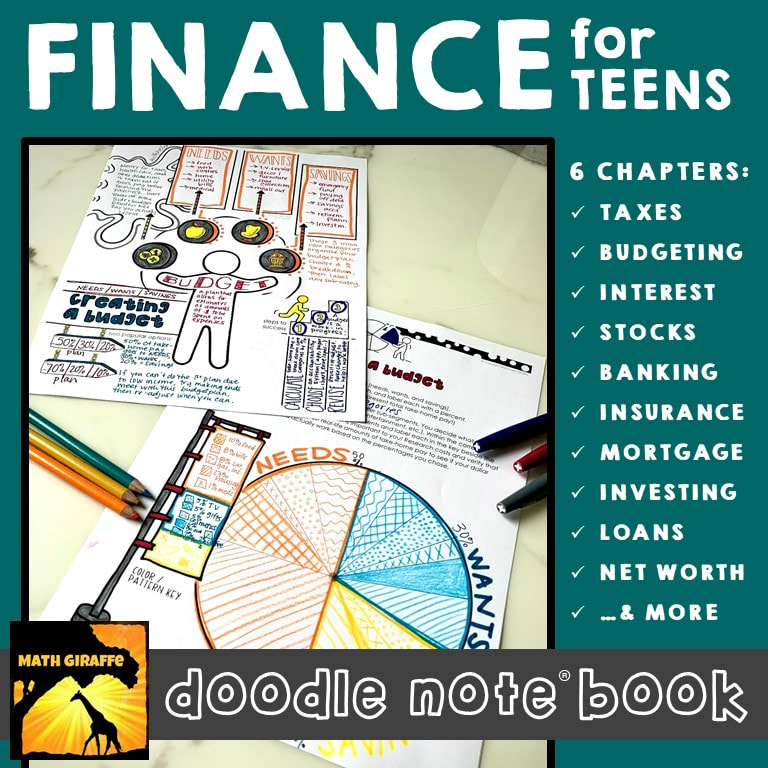
9/5/2020 29 Comments Teaching Finance to TeensTips, Resources, and Ideas for Personal Financial Literacy Skills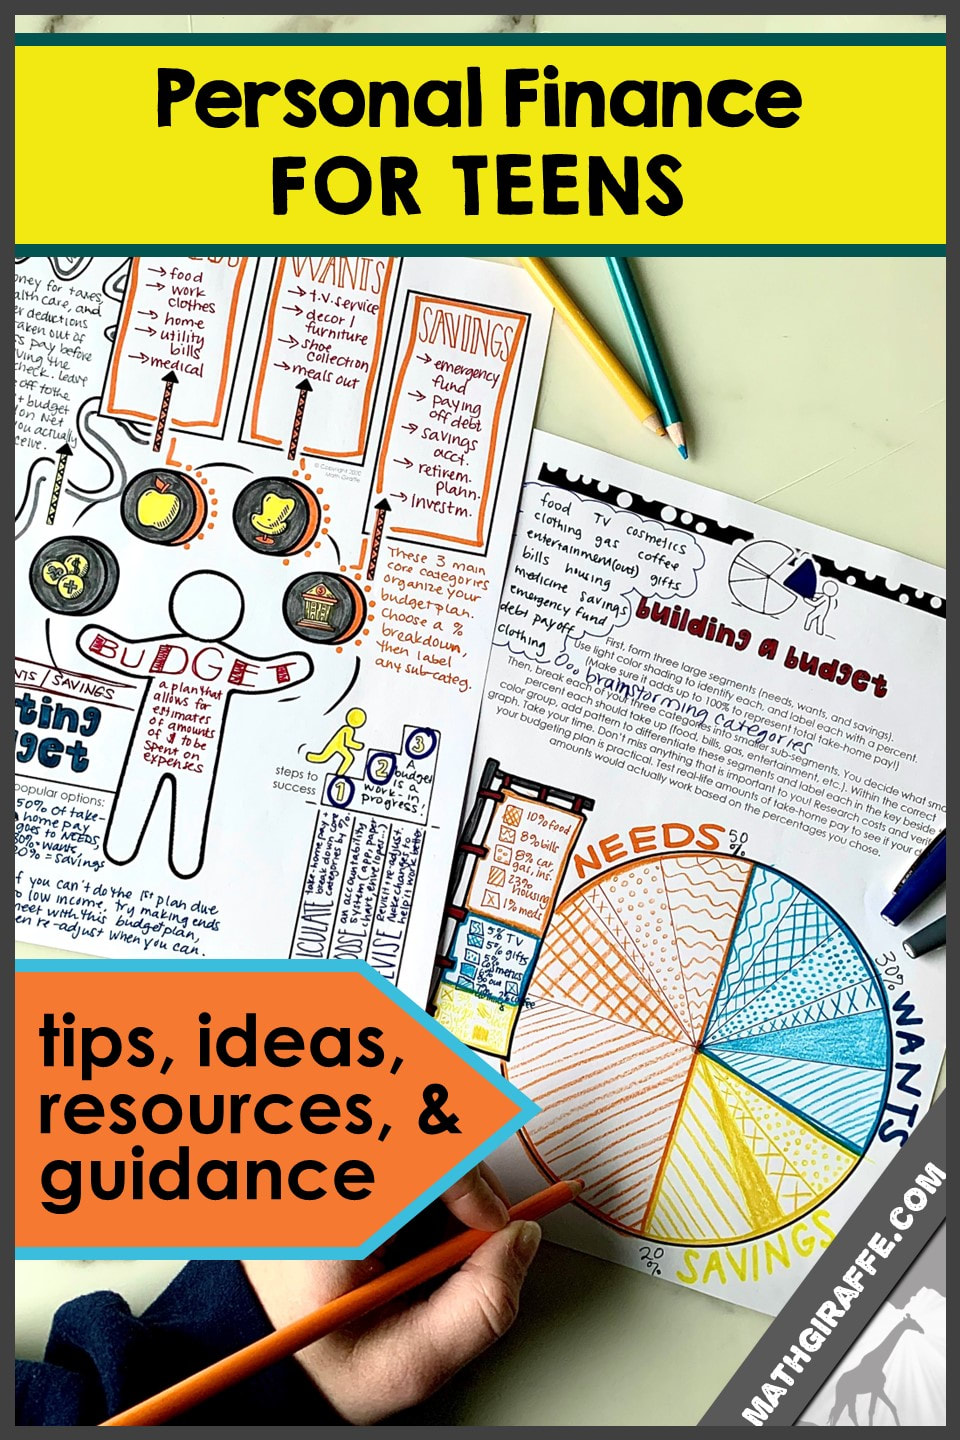 Let's start with the WHY: Why We Need to Teach Teens Personal Finance Here’s a scary fact for you: In the U.S., 40% of people have not set themselves up financially to afford even a $400 unexpected expense in case of an emergency. Even more startling, nearly HALF of American families have a total retirement savings of $0. Wow. Our young adults (and some older families as well) are DEEP in debt. We're a financial mess! Some experts argue that when teens are not taught beneficial money management, they are more impressionable and might develop their parents’ habits and relationships with money, good or bad. If we teach them financial literacy, they’re more likely to adopt a better relationship with money and develop better habits that will stick for life. Financial literacy means that you can understand basic financial concepts and are able to manage your personal finances. According to a recent report from Next Gen Personal Finance, only 1 in 6 high school students is required to take a personal finance course to graduate in the United States. It’s also scary to learn that women have even lower financial literacy rates than men nationwide. And sadly, what happens in a young adult's financial life reaches into their personal life and health as well. Those who start to struggle with debt or have managed their money poorly end up more likely to battle stress and depression, have higher risk of suicide, and even begin to see a negative impact on physical health. Even our smartest teens and young adults are not equipped to start out their adult financial life on the right foot. Then dive into the HOW: How to Teach Personal Finance to Teens After learning more and more about what a massive problem this is becoming for our young Americans, I gathered a lot of input from students, parents, and teachers all across the U.S. I’ve been getting really passionate about teaching this topic properly. Most of our middle schools and high schools are not integrating a complete personal finance class. And those that are teaching a financial literacy course are having some challenges with getting it started. Either they have to develop their own curriculum, or they’re given a standard financial “coursework” collection that is incredibly dry and hard to plow through. Not much is out there that is engaging for kids, collected in one complete sequential course, and actually designed with the learner in mind. So I got down to business. I connected with teens, parents, and educators to collect all the info I needed on what would be a good fit. Then I started dreaming up the right blend of content and creativity, while incorporating all the brain research on how teen minds learn and remember! Here are the tips and resources that I came up with to address these challenges and teach our teens the financial topics they need to know as they transition into adulthood. TIPS: 1. Make it relevant. Teens are not going to feel connected to content that comes from a bank website, or is fed to them by an investment company's "curriculum for personal finance." Instead, print out some pictures of real cars that are for sale. Allow them to choose the vehicle they'd want to purchase or lease in real life, according to their own preferences. Let them pick which home they’d like to rent or buy, and then use those real prices to set up the example. Compare the lease prices and purchase prices over the long term and let them see how it actually works out. This will feel like a much more relevant practice example because it offers a "sneak peek" that feels closer to their present situation. Teen brains are still developing, and lack the long-term perspective that allows them to really "see" their future selves. Buying a car feels more realistic than trying to imagine a future self as an investor or participant in a retirement account. 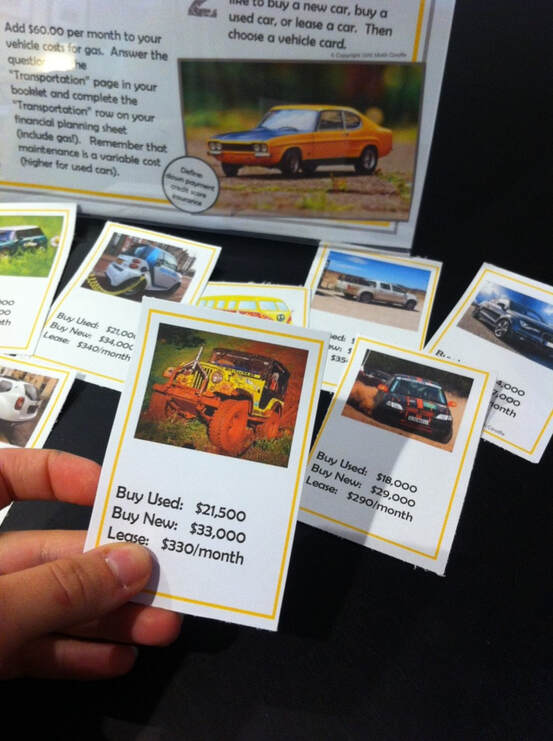 Along the same lines, when you show the time-value of money, focus in on the younger self and the feelings or imaginary statements that each investor would make. It's hard for a young brain to relate to the "retired" person's situation. They'll internalize the lesson better by seeing what that person wishes they did as a 20 year old. 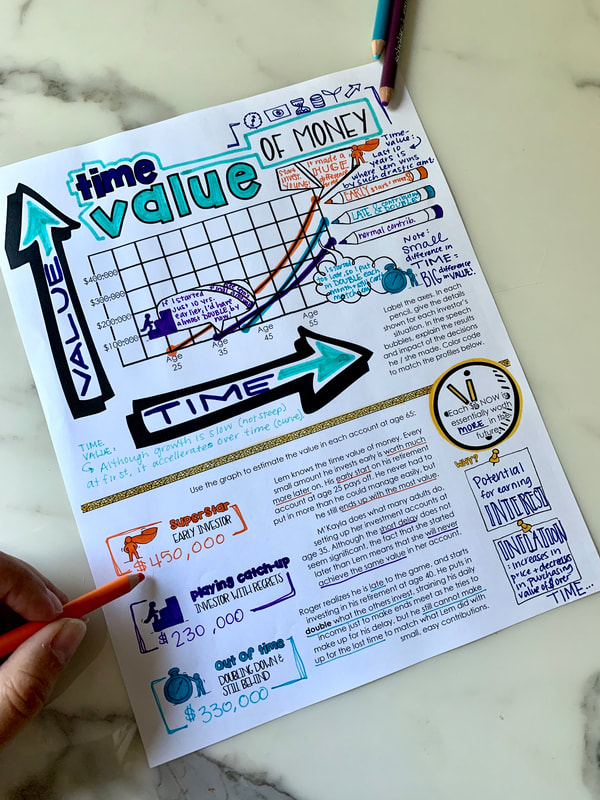 2. Show the possibilities and potential that can be within their reach. Draw in the teens who may feel like this is not for them. Instead of plowing through dry online content from financial experts, address your teens specifically. Show them the stats to let them see how attainable “wealth” really is. For example, the page below has students representing certain stats from a survey of people with "high net worth" ($3 million +). Students discover that these millionaires for the most part grew up poor or middle class! Then they see that the majority of them don't have what you would imagine a millionaire's yearly income would be. In fact, a quarter of them made LESS than $200k a year and still acheived a net worth of 3 million dollars or more! Suddenly, the students start to see that true wealth is not outside their reach, even if they are currently in a poor family. They realize that wealth is about what you KEEP, not what you spend (and not even what you earn each year!) These stats make this content feel much more relevant to teens, and worth learning. This gets them really excited! Maybe your students never thought of themselves as the type of people who could become financially stable! It may have felt so far out of reach that they just tuned this type of content out before. But now they may see that their choices over the next few years will be what sets them up for their financial future. This can make a world of difference for some students. They move on to set goals and see how to make this happen for themselves. Making these lessons relevant and actually ATTAINABLE goes a long way toward engaging students in learning personal finance. 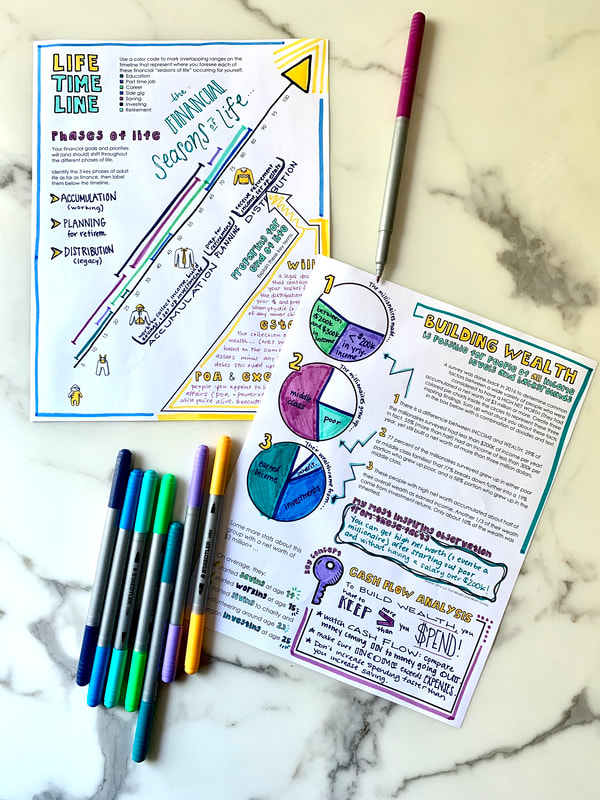 3. Get hands-on. You can do this in so many ways with teens! Engage those brains by incorporating real practice. Get them invested! In the course book I developed, for example, it gets really interactive. Kids have to select one of two common budget proportions and make a chart of their own personal needs, wants, and savings goals. Then, they break it down even further and have to get creative with representing their own budget! They end up with a color-coded pie chart with their own patterns to represent each sub-category and what percent it takes up. They also have to make an entire flowchart of the payroll process to understand withholdings, W2s and W4s, and even take a look at filing taxes with a sample tax table as they learn about the 1040. Each step of learning finance needs to be interactive and allow for creative student OUTPUT, so they’re not just absorbing information, they’re actually synthesizing! 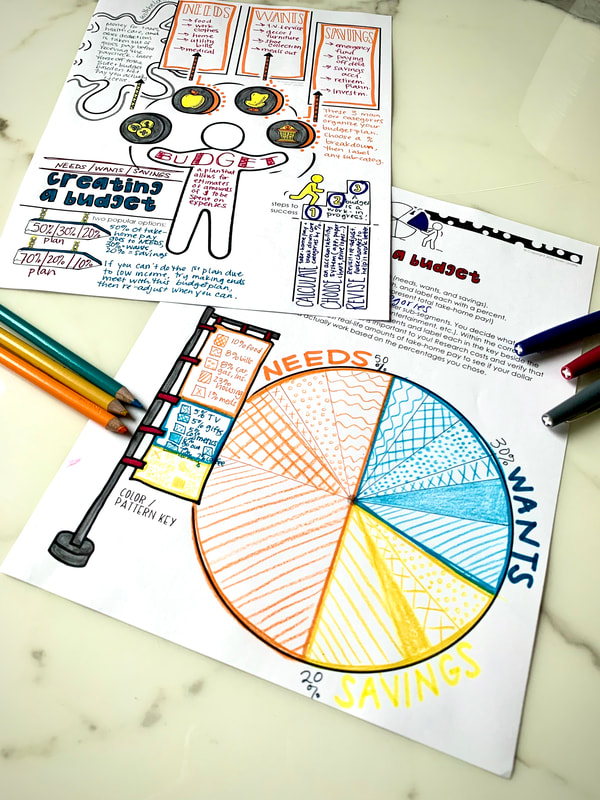 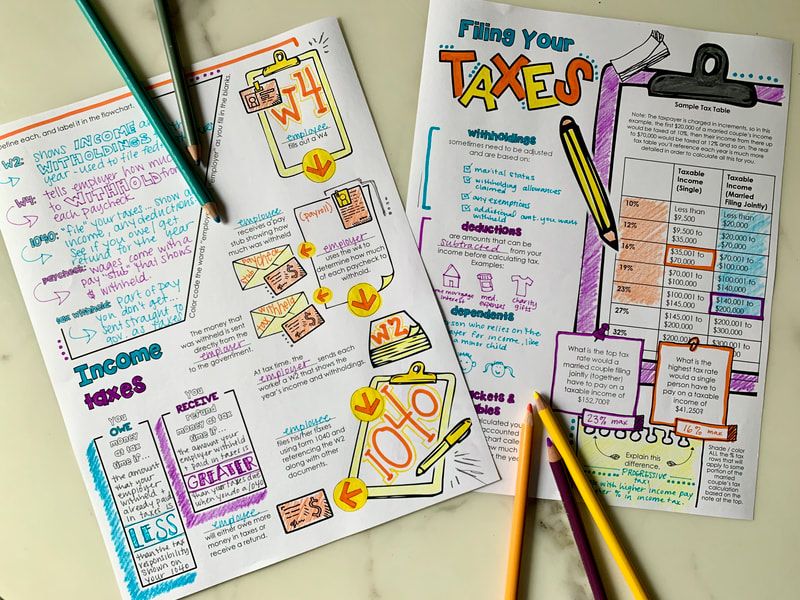 4. Include guided goal setting. I like to have kids pick a passion other than their own personal wishes to work toward. They pick a role model who supports a charity or cause, and they select their own “wealth building” goals that go beyond their own personal bubble. Although teens can have a tendency to be self-absorbed in some ways, they also often have a real desire to make the world a better place. Focus their dreams on making an impact. Our teens are amazing change-makers, and they will get just as excited about being a good steward for their money as they will about having personal wealth to spend! Take advantage of this and use a more selfless approach toward building wealth. Turn it around to show what they can do with it for the greater good. Each student selects personal causes that they are passionate about, and dreams up goals of what they can do with their time and money. It’s a great way to show that good financial habits can impact the world, not just become a selfish pursuit. 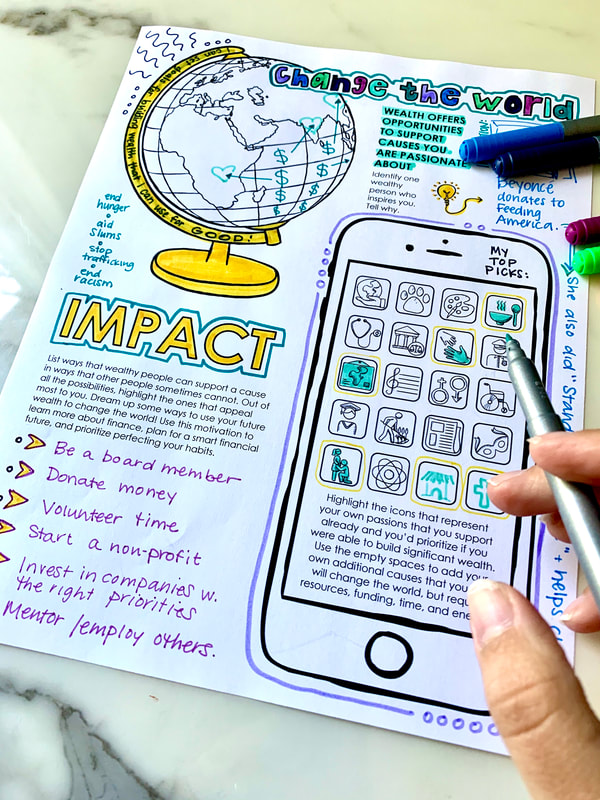 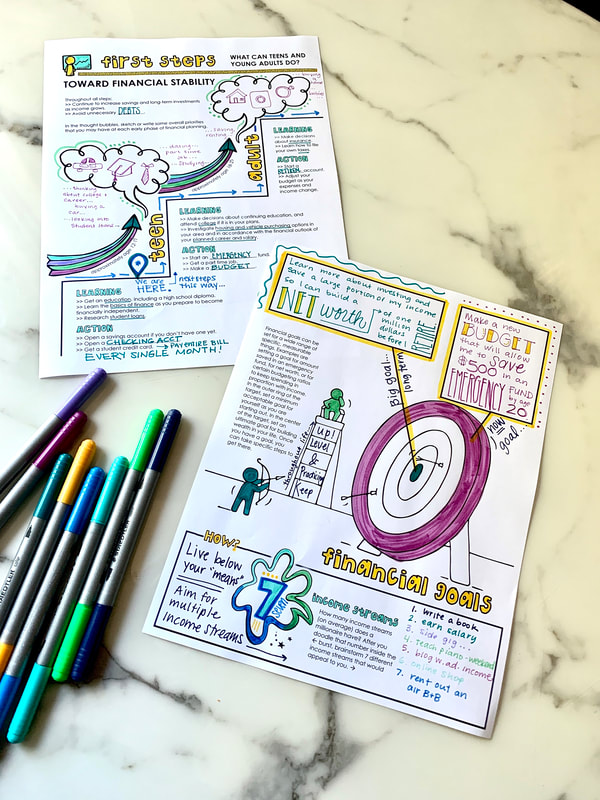 RESOURCES: Personal Finance Doodle Note Book This new doodle note book focuses completely on personal finance skills. The visual, interactive guided notes make it approachable for students and allow for creative output. This graphic note-taking method of learning is based on neuroscience and activates brain pathways that lead to stronger retention of the material. It’s organized into 6 chapters that cover the key aspects of financial literacy that our teens and young adults need to know. This is designed to work for a full class in school, OR for individual kids at home (middle school or high school level). The digital PDF of the entire book is now available, and I also published hard copy paperback books as an alternative option for those purchasing for their own child instead of using it for a full class. 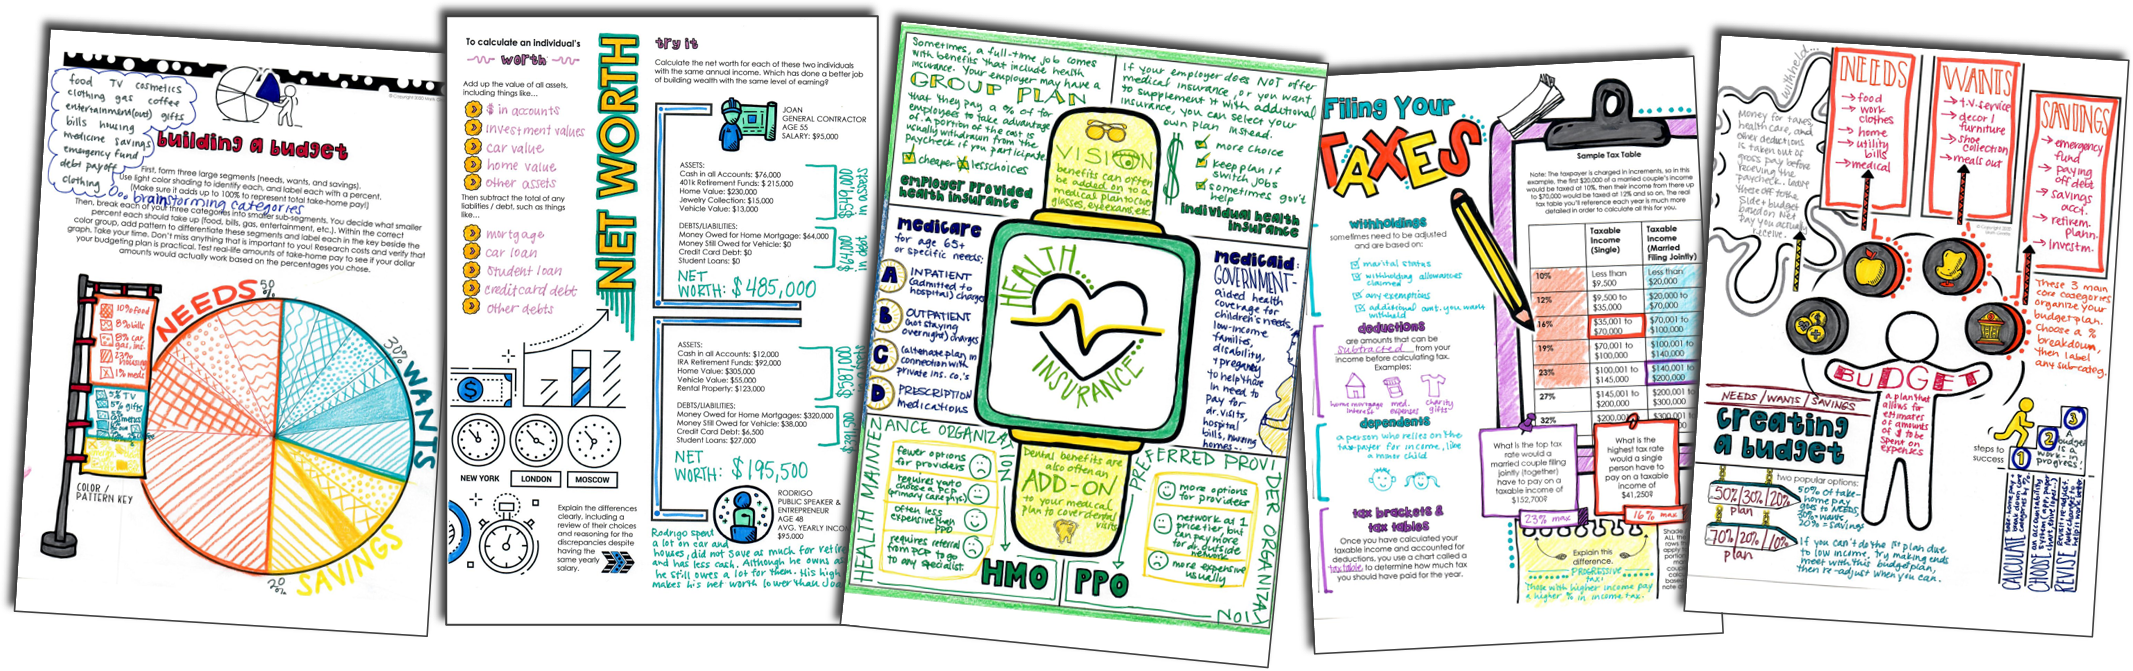 Here are the details: The Personal Finance Doodle Note Book offers your middle or high school students the brain benefits of visual note-taking all throughout their financial literacy coursework! The doodle notes include taxes, budgeting, credit, interest, stocks, banking, insurance, mortgage, investing, loans, net worth, and more! This contains everything that teens need to know in order to transition into adulthood and become financially independent. (In fact, it will put them ahead of most young adults who are frustrated that they've never learned these concepts!) Each chapter progresses through the lesson topics with guided notes with visual memory triggers, interactive tasks, and graphic layouts that follow the brain-based doodle note method. In addition to learning the concepts in a creative way that transfers well to long-term memory, students will develop their own budget, draft career paths, create a personal timeline for the financial phases of life, make plans, and set financial goals. The 6 chapters are:
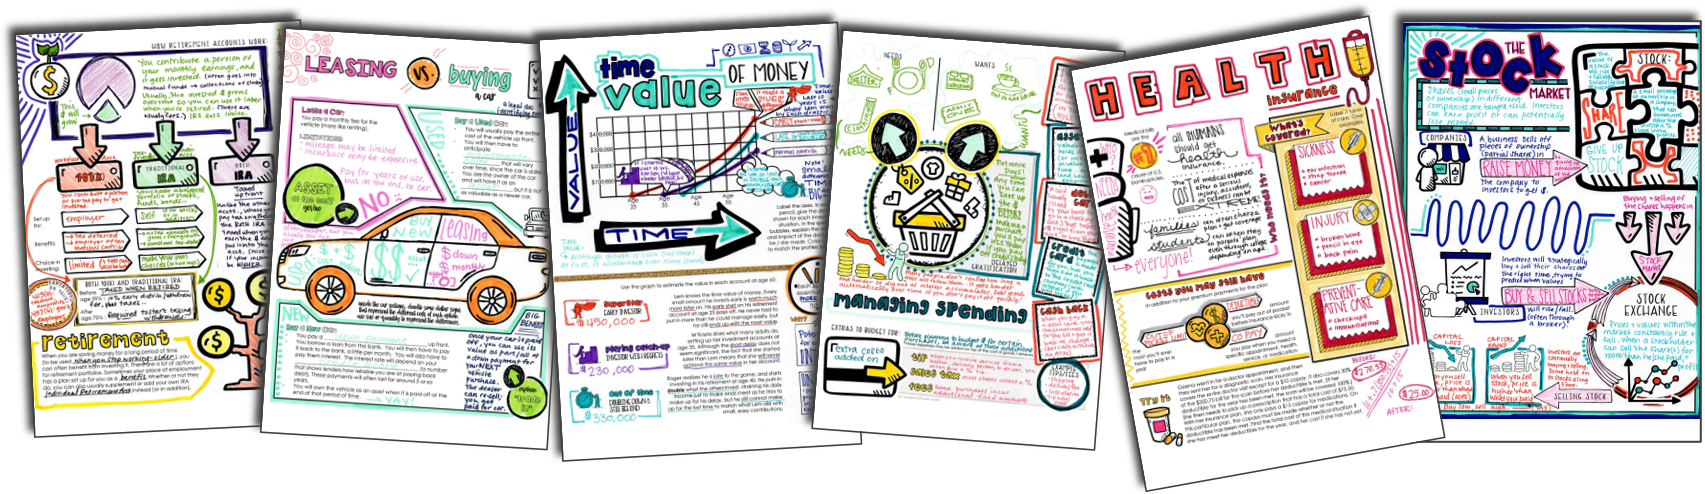 Why doodle notes? Doodle notes activate both hemispheres of the brain and lead to increased focus and retention! Because of dual coding theory, the student brain can process the new content more easily through the interactive tasks, visual memory triggers, and opportunities to sketch, color, and embellish! Click here to learn more about doodle notes. Go to this link if you’re interested in learning more about the Personal Finance Doodle Note Book. I’ve got a paperback version for single students at home, as well as a digital teacher license to print the PDF for entire classes. 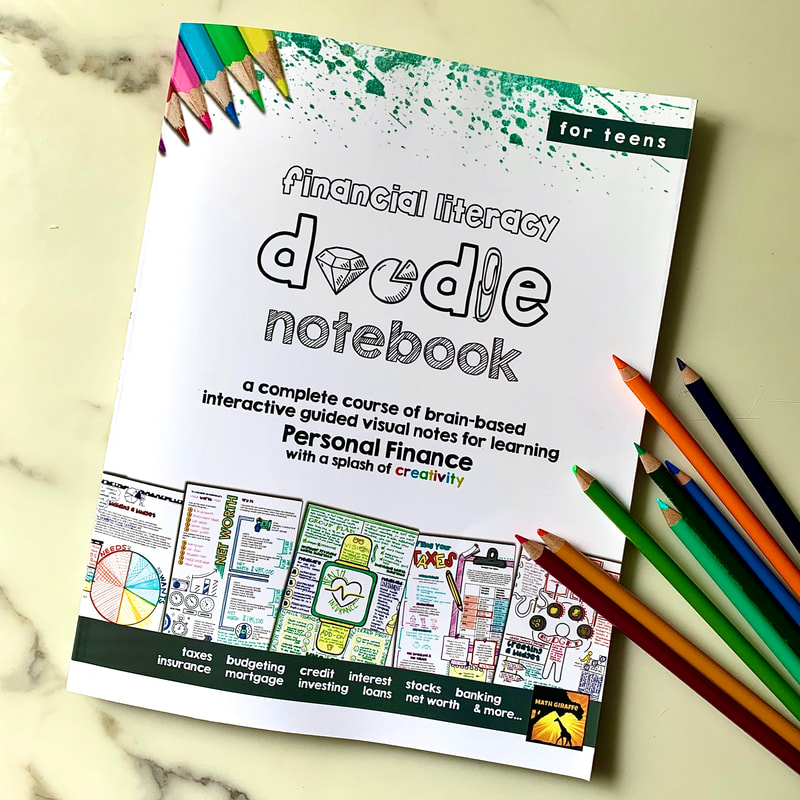 FREE AUDIO ADD-ON: I’m also offering a FREE audio supplement that will provide the “lecture” portion of the doodle note lessons! This free add-on is available at that same link, and lets students work through the book at home (or in school) by listening to my voice like a podcast while they interact creatively and build their note sheets! 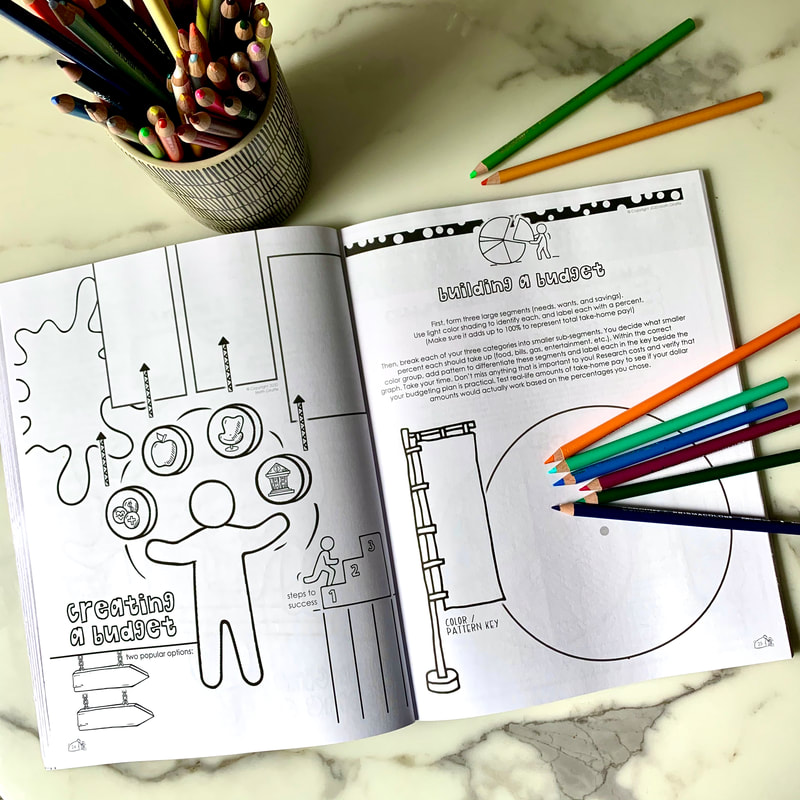 Financial Fun Day Another option (or supplement to the book) if you are a classroom teacher is to do one huge "Financial Fun Day." If your school does not have a full course on personal finance, but your kids are begging you to take a break from the Algebra and teach them what they will actually need to know for real life, this method is a wonderful alternative. This is an awesome way to pack all the material into one day, and the great thing is that when it is all covered together in one day, the flow allows for it to actually be more relevant. The students make decisions and put together a whole "life" of choices. They can choose a home to buy or rent, get a car, and look at insurance plans. The financial day can include lessons on mortgages, interest, budgeting, credit, taxes, and so much more.  The actual math skills required for most of the personal-finance /consumer math concepts are limited to decimals, percents, and exponents. A 7th grader can do most of the math work, but the material is incredibly applicable to a high school senior as well. This means that you can cancel classes for one full morning, pull all your students together, and run through it all at once. The day is really enjoyable for them, but the huge bonus for you is that then, you only have to do the unit every two years! Click here to read my previous blog post that walks through that approach. Additional Resources: In this age of technology, everything you might need to know is right at your fingertips. You just need to know how to find it. In a teenager’s case, they also need to be made aware of the importance of this knowledge. There are plenty of books, blogs, games, apps, podcasts, and even TikTok creators educating about personal finance. Especially if teens aren’t getting the push from home, they need their school to provide these resources and bring them front and center. Try setting up a little Financial Literacy bulletin board filled with information and even books they can borrow from the library. Here are some lists to get you started: Other Books
Games and Apps
Financial Blogs Podcasts on Finance Do you make it a point to teach teens personal finance in your classroom? Any questions about how the book works? Let us know in the comments! Shop Resources Shown Above: |
Archives
December 2023
Click to set custom HTML
|


 RSS Feed