
To use this structure correctly, you need the right technology and a quick and easy way to prepare the lesson. A discovery lesson should only replace a typical lecture when it is just as effective, does not waste extra time, and is just as smoothly implemented.
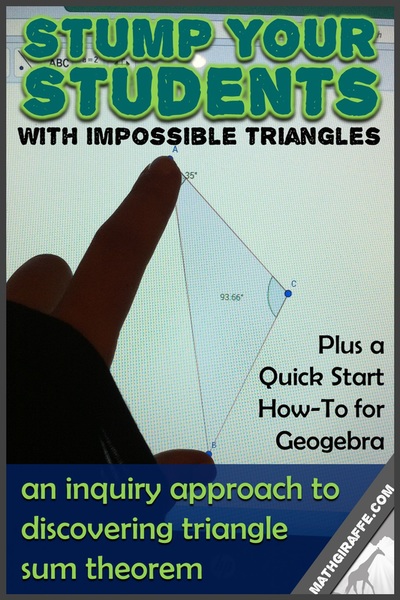
My favorite tool for teaching with technology is GeoGebra. With the GeoGebra software, you can set up a lesson for your students in only a minute or two, and they can see relationships in figures that are impossible to view and manipulate in a typical math lesson or lecture. This software is free for teachers and students to use. I have put together a quick-start guide with a few sample lesson ideas. This will show you specifically how you can use the software to set up a smooth discovery lesson for your Geometry students. Basics
Getting into the Software & Setting Up:
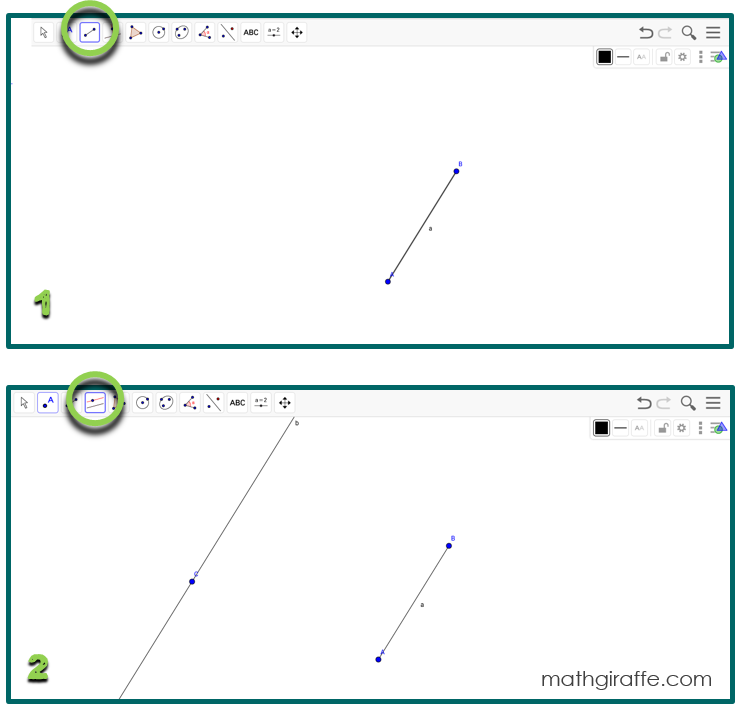
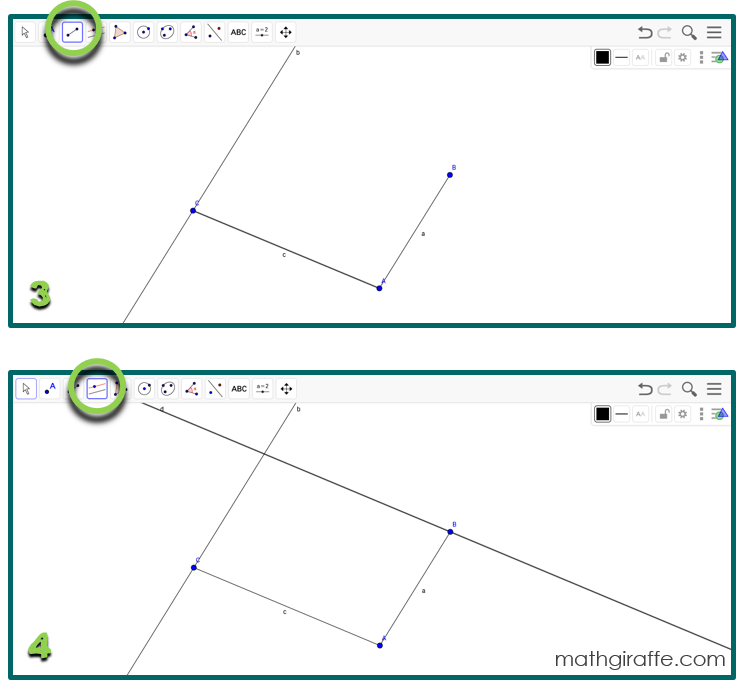
1. Go to Geogebra.org and click “Start GeoGebra” (There are also materials and lesson guides available to browse.) 2. Set up a “Geometry” working screen. 3. In the menu (three horizontal bars in the top right corner), select “options.” In options, select “labeling.” choose to “display all new objects.” This helps your students to save time and communicate in pairs more easily by saying “Move point A”, etc. 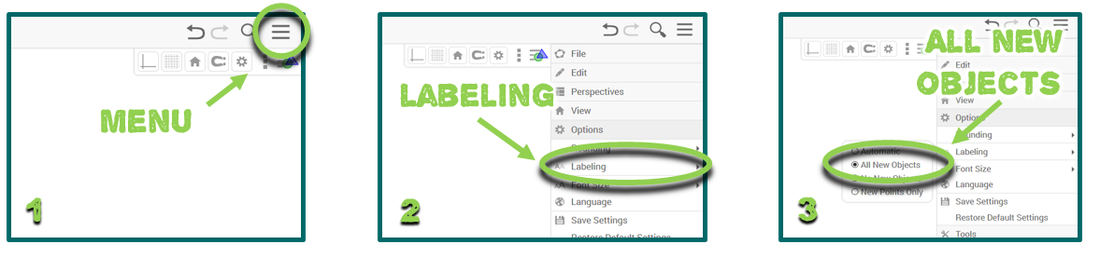
Play around the first time you get in. Practice making a triangle by selecting a “polygon” from the top menu. Click three times to make the three points, then click again on the first point to close/finish the figure. Then select the arrow from the top menu to drag a vertex and manipulate your triangle. Try displaying an angle measure by selecting the angle tool in the top menu, and then clicking on the two lines/rays that form the angle. Try displaying a side length as well.
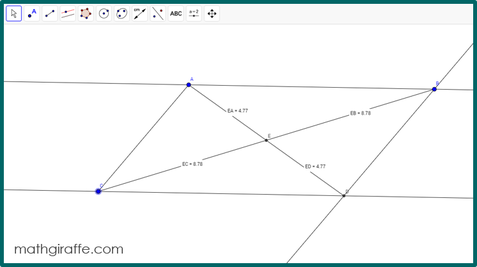
These are the basic tips you will want to show your students. Before your first investigation lesson, work together at the front of the room (if possible) on a smart board or using a projector. Allow students to practice manipulating a figure, creating new diagrams, and displaying measures. Sample: Diagonals in a Parallelogram
Depending on the level of your students, you can do the “Prep” part ahead of time as the teacher, or you can have students follow these directions and start from scratch.

Lesson:
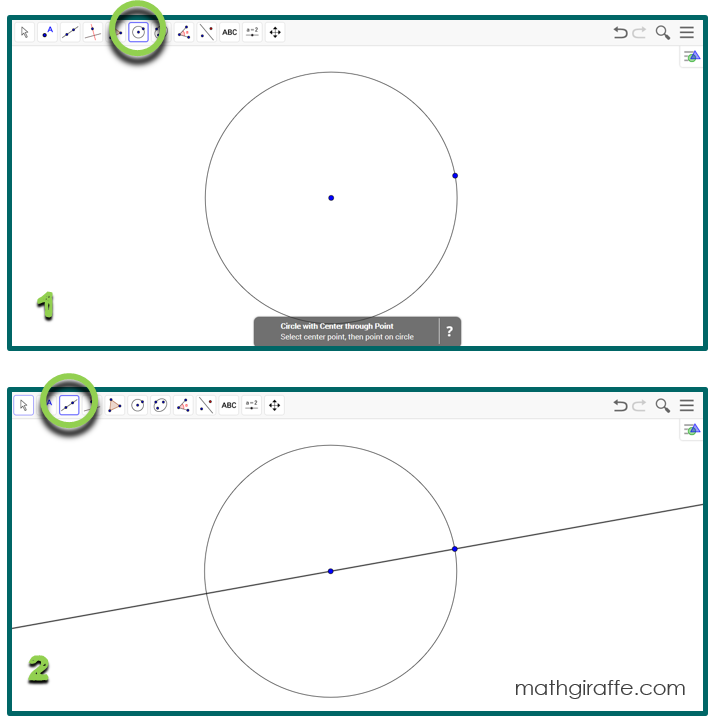
1. Give students (in pairs) the prepared screen with a parallelogram (or directions to construct their own) and ask the following essential question: “What properties do diagonals of a parallelogram always have?” (Explain a “diagonal” if necessary.) 2. Allow students to work in pairs to add the diagonals, manipulate the diagram, and make observations. Encourage them to display angle and side measures to try to determine relationships. Have them discuss what happens as they drag a vertex. Which measurements change? Which stay the same? 3. Try to avoid giving too many hints. This learning process is great for their brains! 4. Require students to formally write up their observations. 5. Encourage students to extend the properties to other quadrilaterals. Next, have them construct a rectangle and its diagonals and observe what properties are maintained as vertices are dragged. What about a trapezoid? 6. If your students would benefit from reflection or additional structure, try using the half sheet that works for any hands-on digital discovery lesson in Geometry. Sample: Angle Inscribed in a Semicircle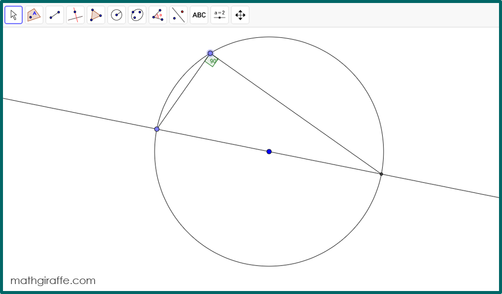
Depending on the level of your students, you can do the “Prep” part ahead of time as the teacher, or you can have students follow these directions and start from scratch.
Lesson:
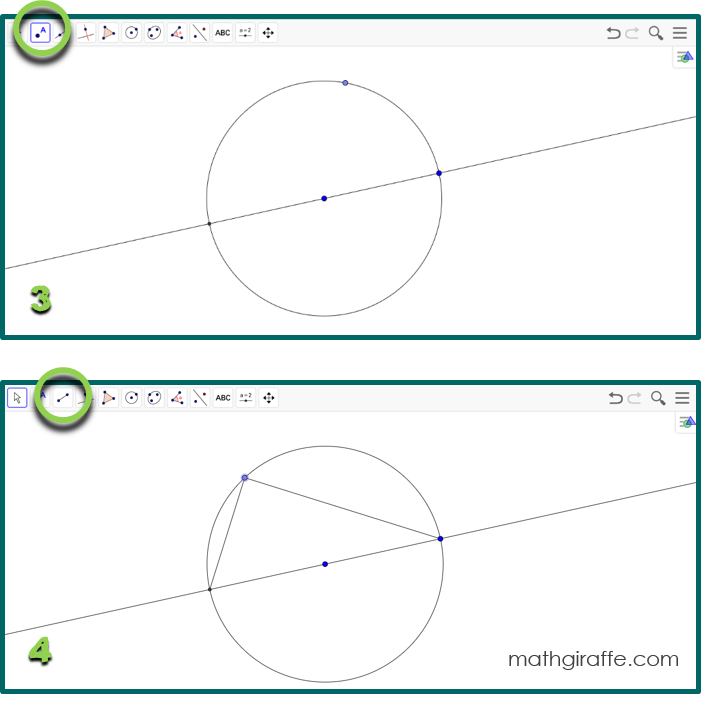
1. Give students (in pairs) the prepared screen with a circle and an angle inscribed on the diameter (or directions to construct their own) and ask the following essential question: “What properties do angles inscribed in a semicircle always have?” 2. Allow students to work in pairs to manipulate the diagram, test cases, and make observations. Encourage them to display angle measures and lengths to try to determine relationships. Have them discuss what happens as they drag the point on the circumference and when they make the circle larger or smaller. Which measurements change? Which stay the same? 3. Try to avoid giving too many hints. This learning process is great for their brains! 4. Require students to formally write up their observations. 5. Encourage students to extend the properties to other inscribed angles. Next, have them construct different angles in the circle that do not subtend the diameter. What about angles that are not inscribed? 6. If your students would benefit from reflection or additional structure, try using the half sheet that works for any hands-on digital discovery lesson in Geometry. Resources, Links, & Tips
• Use digital discoveries only when a physical hands-on idea will not cut it. It’s important for kids to physically touch and move items whenever possible. This just cannot always be achieved in a tangible format without technology. Try physical activities too, like this hands-on lesson for discovering Triangle Inequality Theorem with markers with snap-on caps.
• Allow students to spend a little time exploring with the technology at the beginning, or during the first lesson that you introduce this type of activity. The more comfortable they are, the more options they will have for adding to their diagrams, changing things, manipulating what is there, and exploring new ideas and properties. Your students will likely catch on to the software faster than you can, so rather than trying to spend a long time teaching them the toolbar, just let them have at it! • Take time to set up your expectations and formal structure for any period that they are working this way. Decide how you want groupings to work (pairs or teams of three are great for this) and try to keep consistent partners throughout at least a quarter. Determine how much structure you will give, and whether you will kick off each property/lesson with a question, or only a figure. Explicitly teach students what you want them to turn in at the end. Do you want only the properties they discovered or a full reflection as they work? It may be nice to have them submit a diagram or two representing what was on their screen. They can always use extra practice drawing and labeling diagrams, so this approach can serve as both purposes. • Take a look at some of the built-in lessons in GeoGebra, as well as these in SketchUp. The SketchUp software is another option that allows you to do easy tessellations, let your students explore pyramids, prisms, and more. It’s great with 3d representations. There are a set of handy videos to get you started. 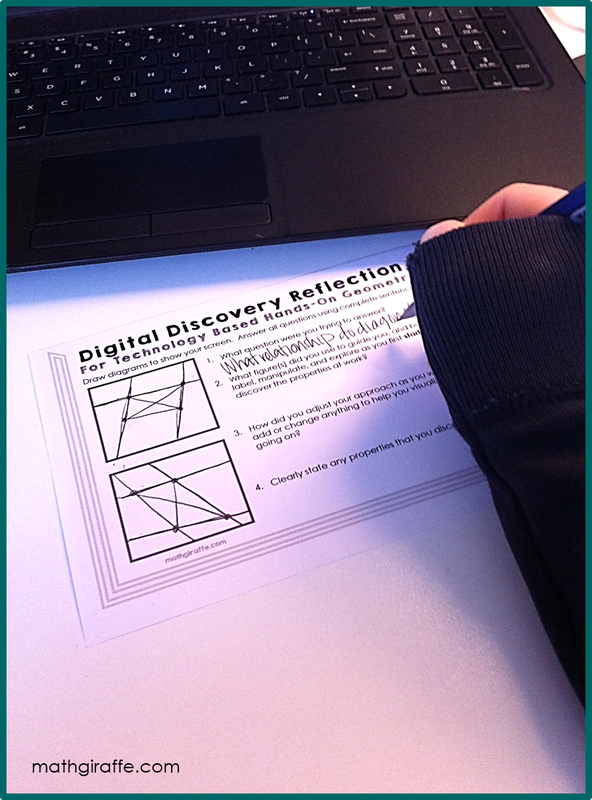
The student recording sheet works for any digital discovery lesson! (free download below)
Click here to download a printable PDF version of this article including all the steps. It also contains a half-page recording sheet for your students to use to accompany any digital discovery lesson.
Join up in the Math Giraffe email list for more! To Read Next:

15 Comments
|
Archives
December 2023
Click to set custom HTML
|

 RSS Feed